Prerequisites
VESSL supports integration with any identity provider that complies with the SAML 2.0 protocol. Below are some commonly used providers:- Microsoft Entra (formerly Azure Active Directory)
- AWS IAM Identity Center
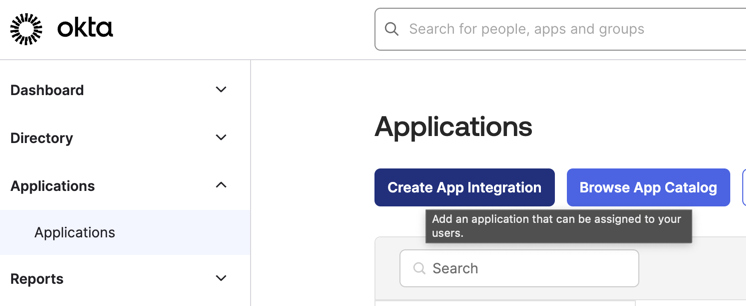
- Okta
Important Notes:
- VESSL’s Assertion Consumer Service (ACS) only supports HTTP-POST bindings.
- The following SAML features are not supported by VESSL:
- Identity Provider (IdP)-initiated SSO
- Identity Provider (IdP)-initiated Single Logout (SLO)
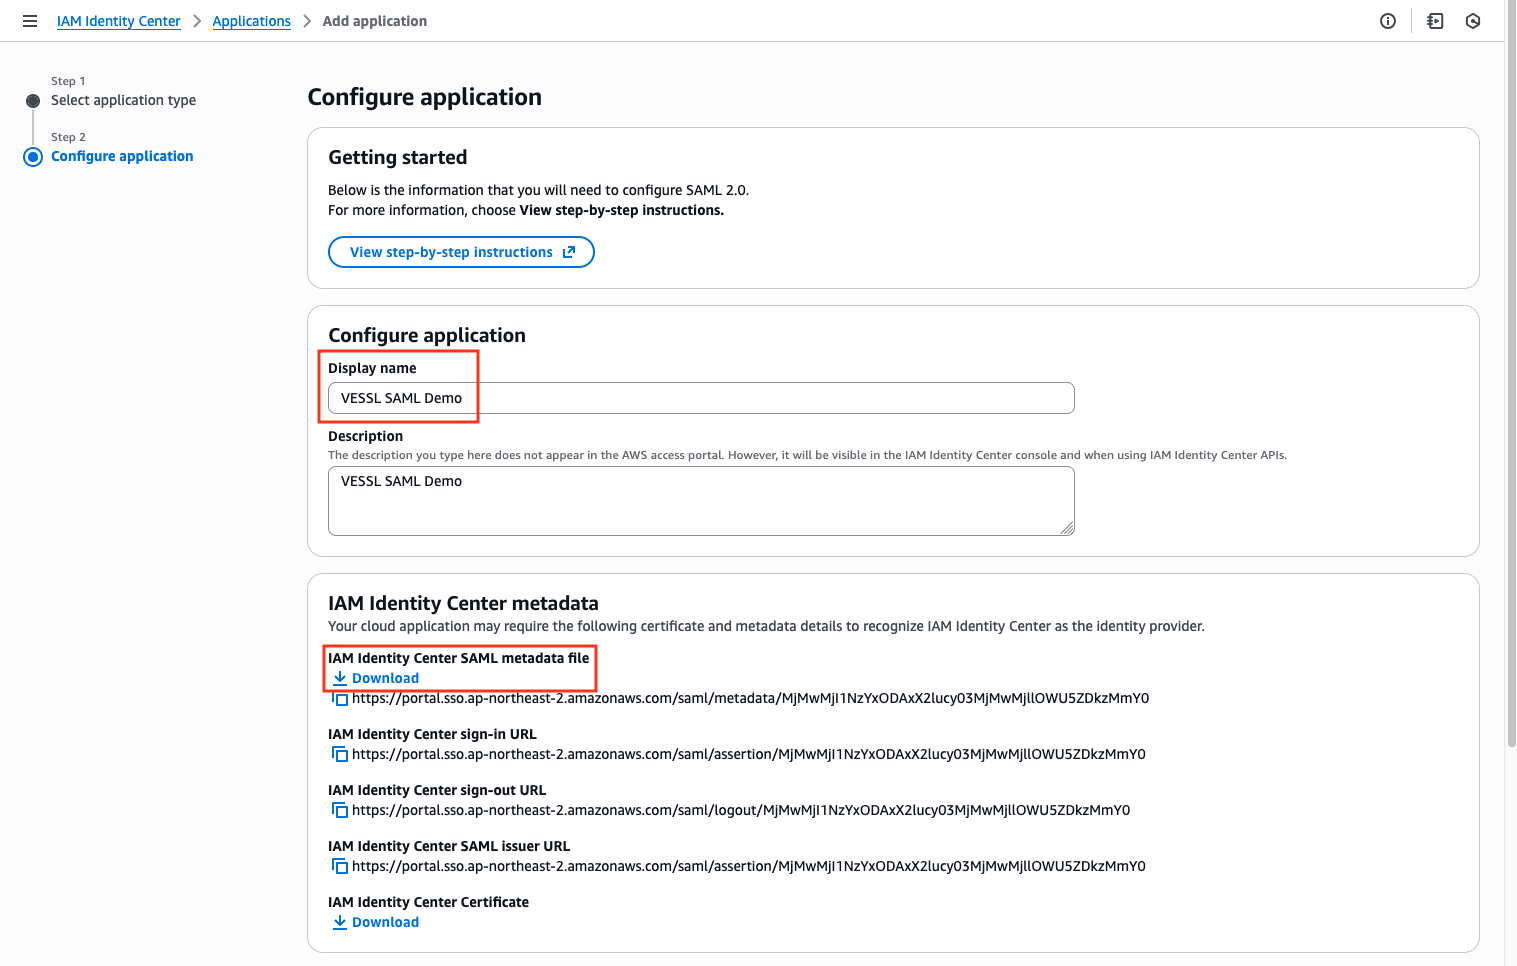
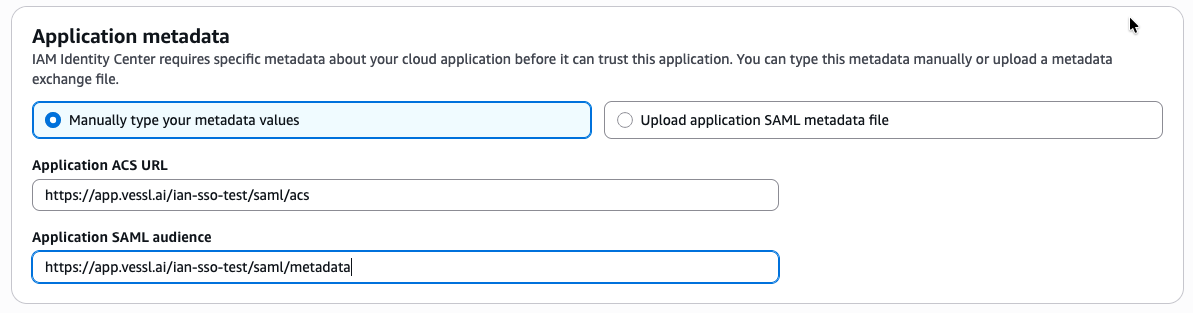
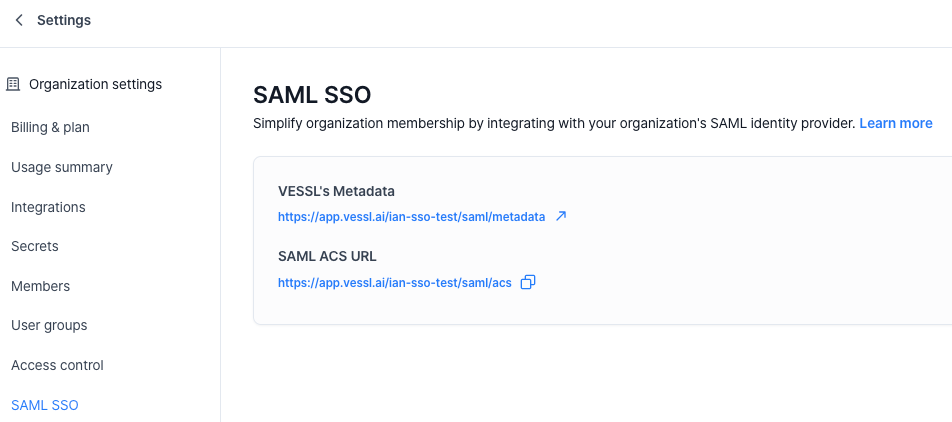
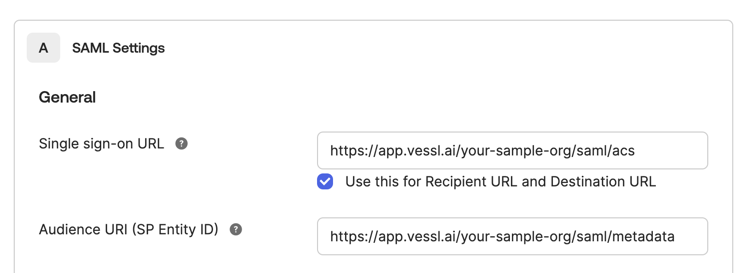
VESSL Endpoints
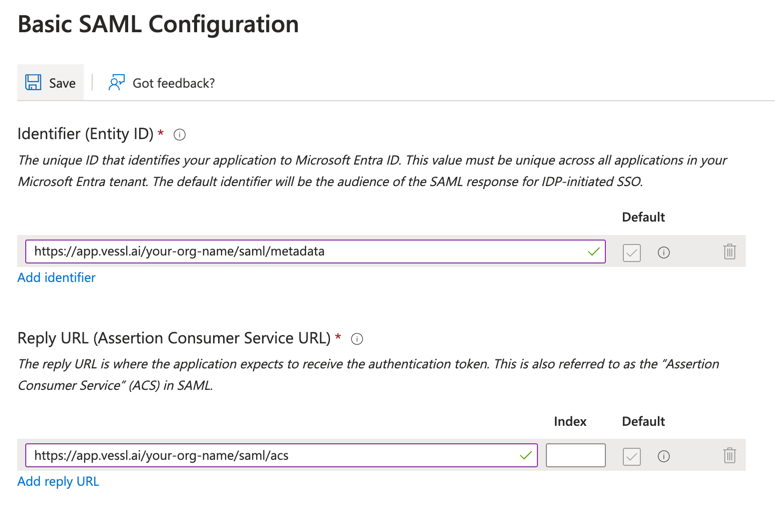
For each organization, VESSL is using the following format for SAML service provider configuration. Be sure to replace{your-org-name} with your organization’s name in the following URLs:
- SAML Entity ID (Metadata URL):
https://app.vessl.ai/{your-org-name}/saml/metadata - Assertion Consumer Service (ACS) URL:
https://app.vessl.ai/{your-org-name}/saml/acs
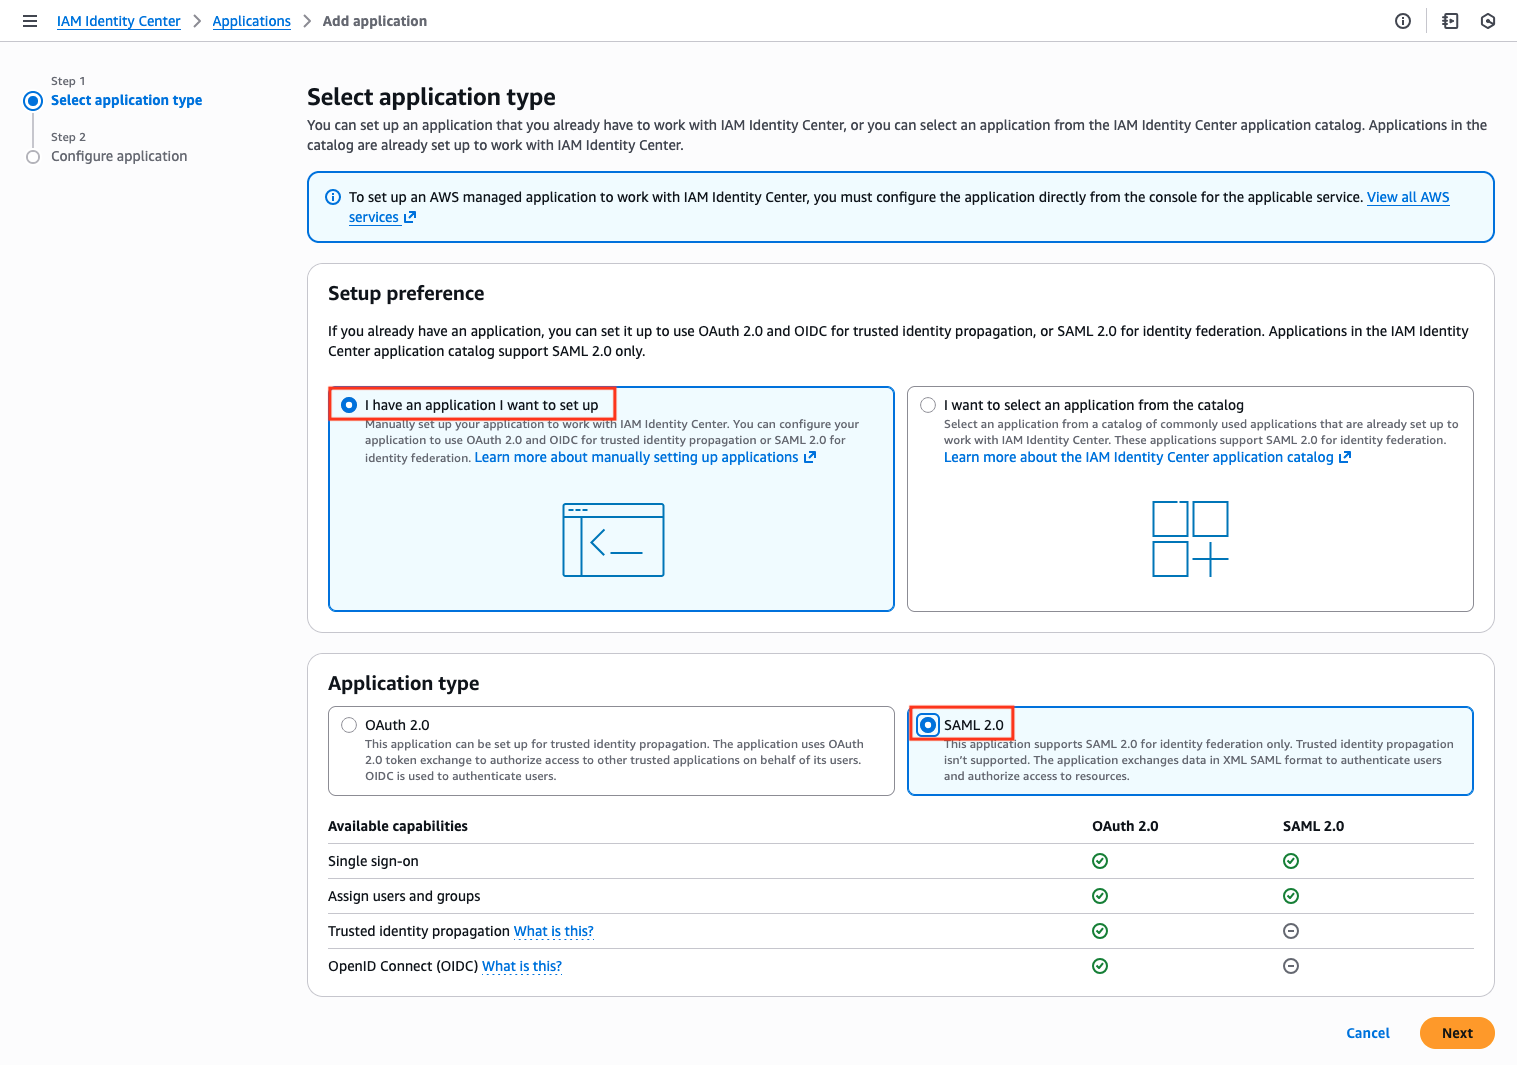
Configuring Identity Provider
Choose the appropriate setup instructions based on your identity provider.- Microsoft Entra
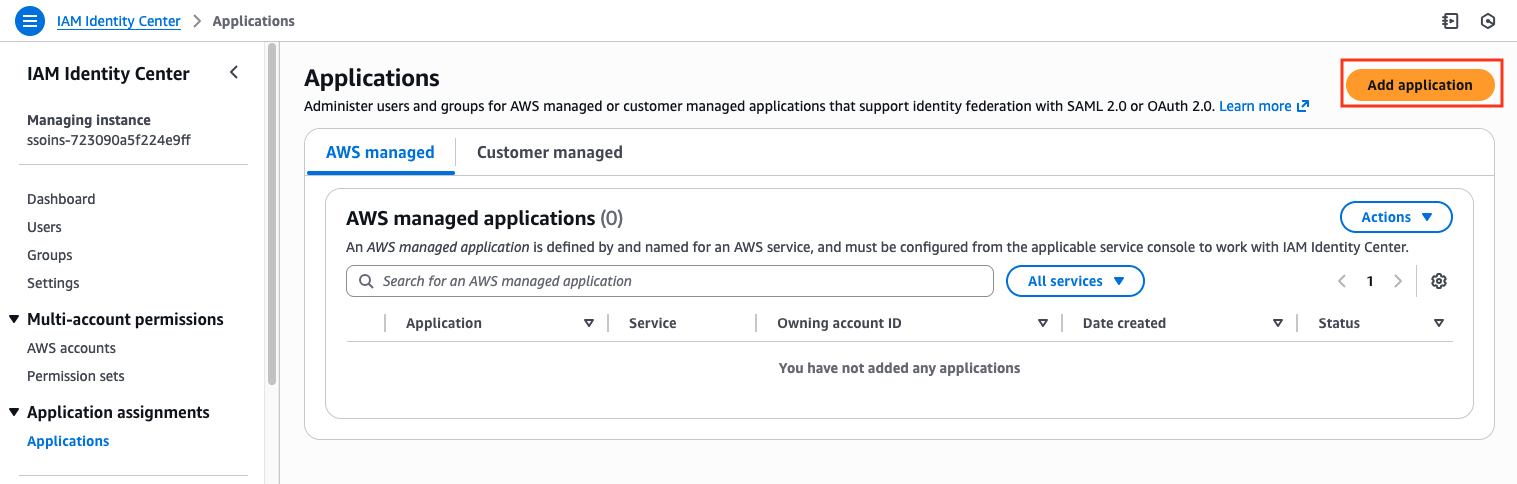
- AWS IAM Identity Center
- Okta
- Custom Identity Provider
Sign in to Microsoft Entra
Sign in to the Microsoft Entra admin center.
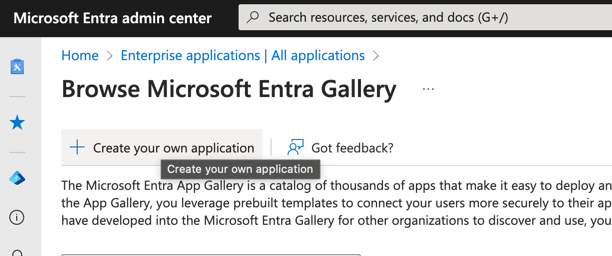
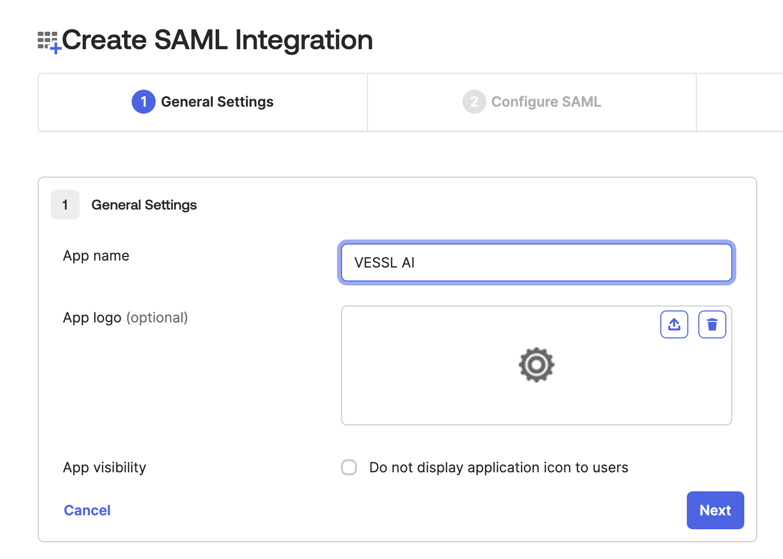
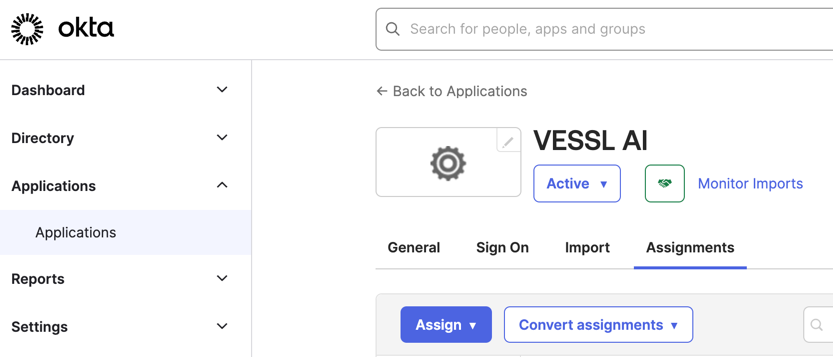
Create VESSL Application
Navigate to Enterprise applications using the search bar.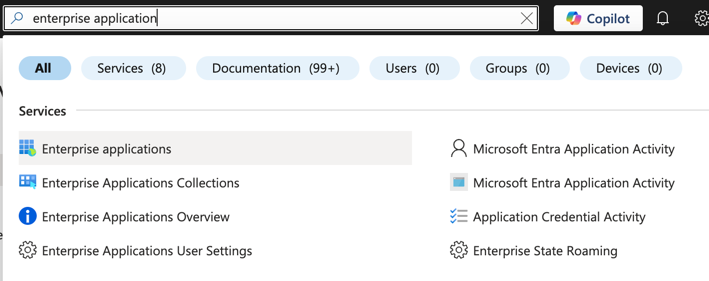
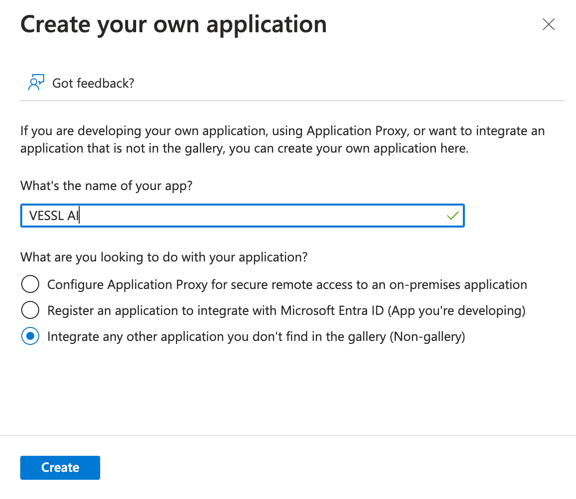
VESSL AI as the application name and ensure you select Non-gallery application. Click Create.Add Users
After creating the application, you’ll be directed to the Overview page.Click on 1. Assign users and groups, then select + Add user.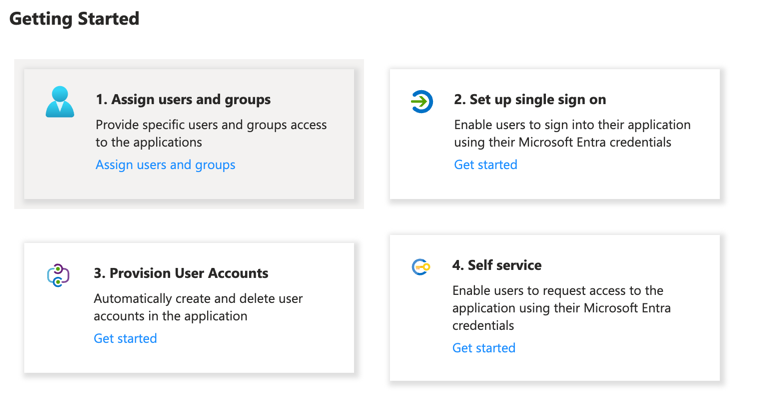
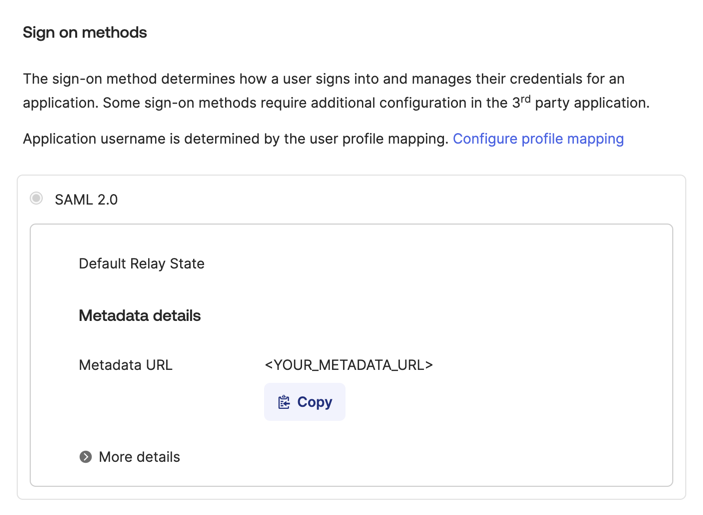
Setup SAML SSO
Return to the Overview page and click 2. Set up single sign-on. Select SAML as the sign-on method.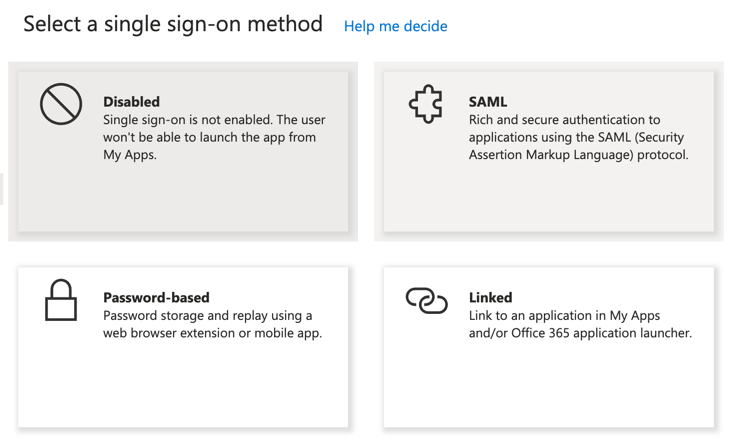
Configuring VESSL
After completing the setup of your identity provider, use the interactive demo below to configure VESSL’s SAML SSO settings.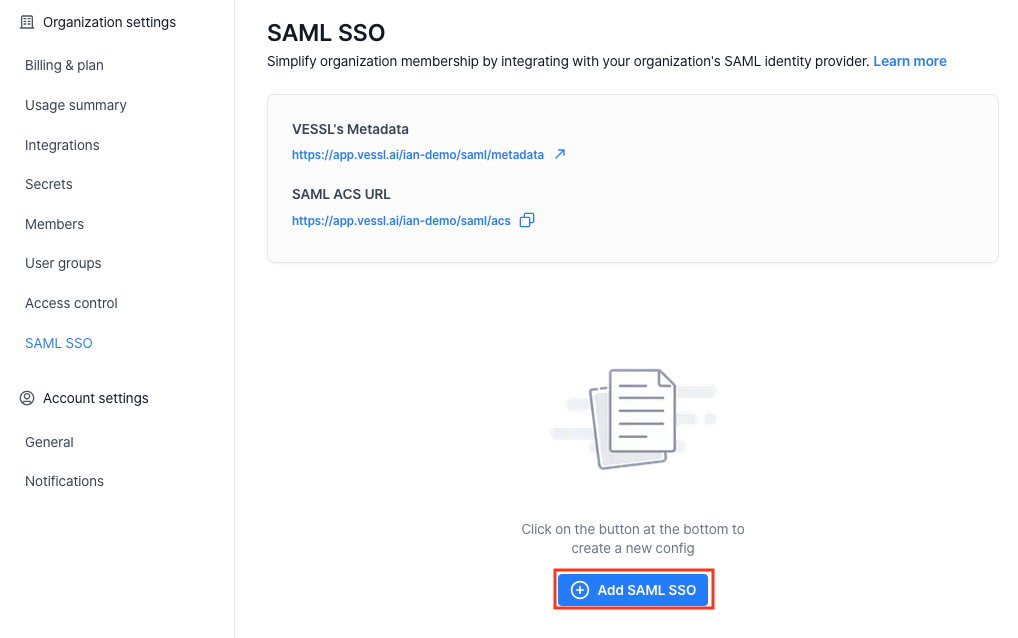
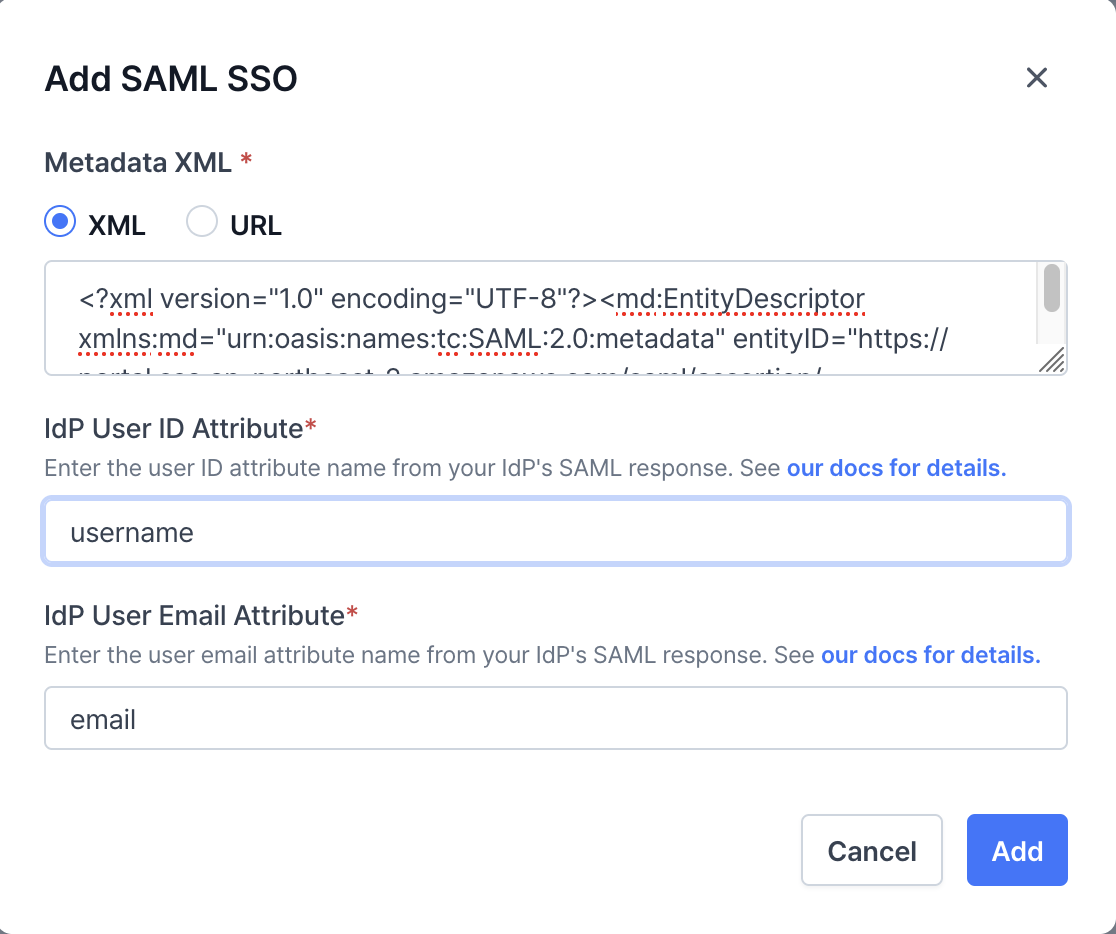
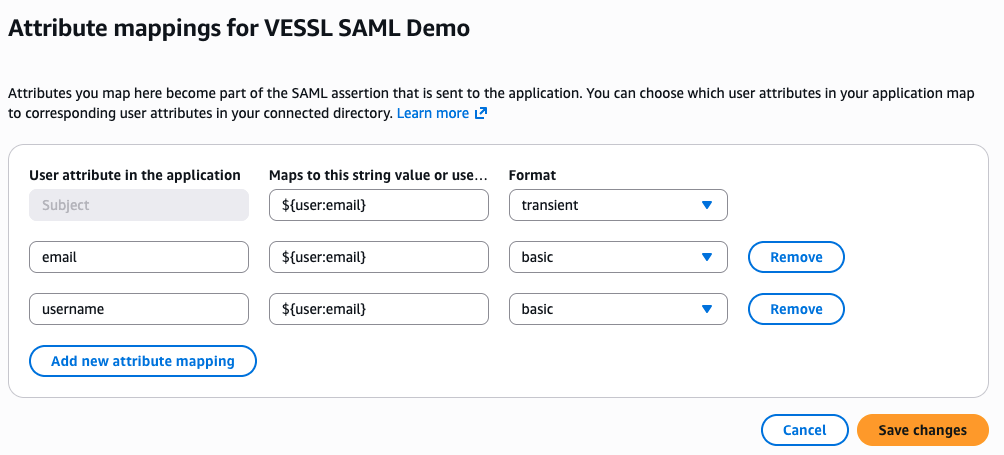
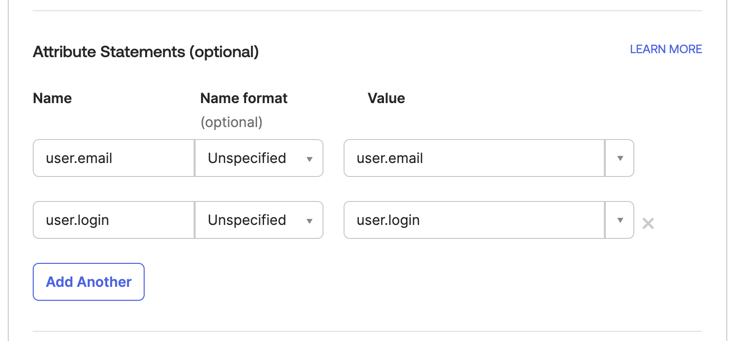
IdP Attributes
Identity providers (IdPs) use attributes to supply user ID and email information. VESSL requires these attributes to retrieve the corresponding user data during authentication. Ensure you configure the correct attribute names based on your identity provider. Refer to the details below to fill in the required fields:- Microsoft Entra
- AWS IAM Identity Center
- Okta
- Custom Identity Provider
Use the following attribute names for Microsoft Entra:
- IDP User ID Attribute:
http://schemas.xmlsoap.org/ws/2005/05/identity/claims/name - IDP User Email Attribute:
http://schemas.xmlsoap.org/ws/2005/05/identity/claims/emailaddress