Step-by-step integration guide
1
Access VESSL on OCI marketplace
- Visit the OCI Marketplace and search for VESSL AI.
- Click on Get App to open the Terraform configuration form.
2
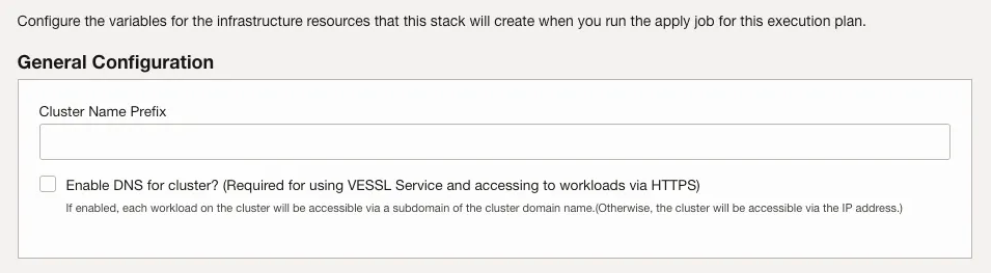
General configuration
Cluster name prefix: Enter the name for your cluster. This name will be displayed in the VESSL platform under Clusters.Enable DNS for cluster:- To use VESSL for easy deployment, inference and to access workloads securely through HTTPS, enabling the DNS option for your cluster is required.
- Enter your desired subdomain for the cluster. For example, if you enter
example.com:- An SSL certificate will be issued for
.example.com - Services will be accessible at subdomains such as
service1.example.comandmodel.example.com.
- An SSL certificate will be issued for
- If unchecked, the cluster will only be accessible through its IP address.
3
OKE cluster configuration
VESSL utilizes Oracle Kubernetes Engine (OKE) to execute your AI workloads.
Set up the CPU compute resources here: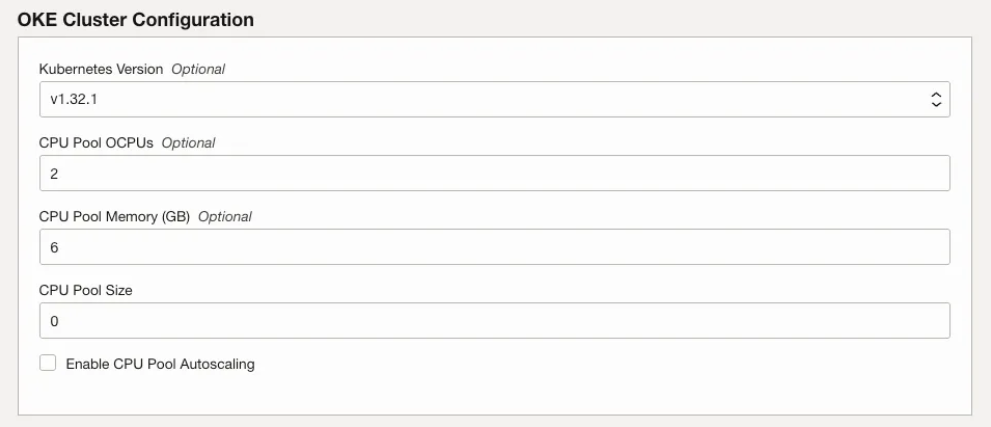
Kubernetes version: Specify the Kubernetes version your cluster will use. Default is versionv1.32.1.CPU Pool OCPUs (Oracle CPUs): Specify the number of OCPUs for each node in the CPU Pool. This defines the processing power per node. Each node in the CPU pool will be provisioned as aVM.Standard.E4.Flexinstance.CPU Pool Memory: Specify the memory allocated per server (default is 6GB).CPU Pool Size: Define how many non-GPU (CPU-only) servers to set up initially.Enable CPU Pool Autoscaling: Enable this option to automatically scale servers based on CPU usage.
4
GPU pool configuration
Enable GPU Pool 1: Check this to utilize GPUs in your cluster. You can enable up to 3 GPU Pools (Pool1, Pool2, Pool3) to accommodate different GPU configurations. Each enabled pool supports the same configuration options listed below.- To request additional GPUs, contact support@vessl.ai.
GPU Type: Select your desired GPU model (for example, A10, A100).GPU Pool Shape: Choose the server shape that includes your selected GPU (for example,BM.GPU4.8indicates a server with 8 A100 GPUs).GPU Pool Node Count: Enter the number of GPU nodes to launch initially within this pool.
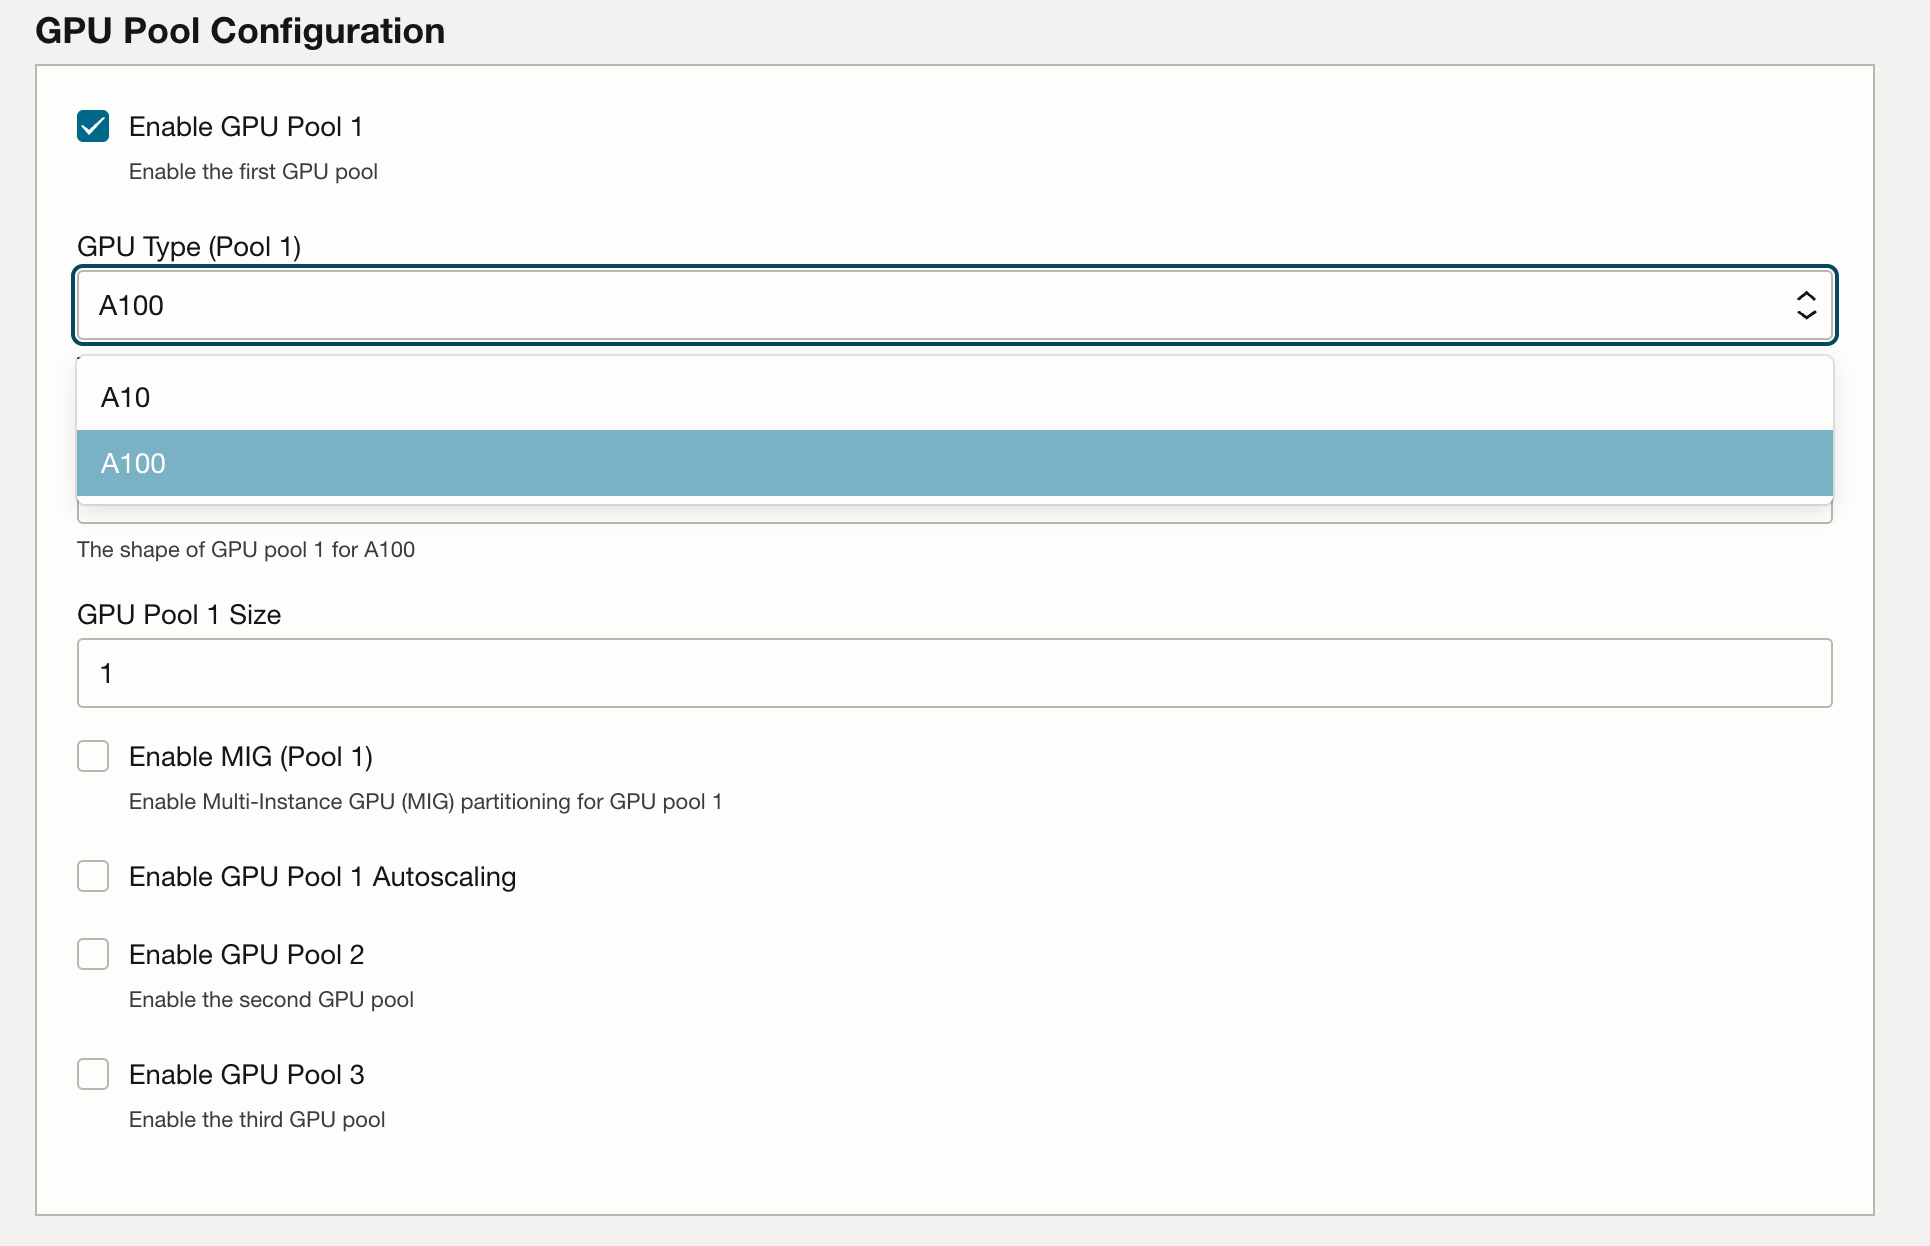
Enable Multi-Instance GPU (MIG):- This option appears only if your selected GPU that supports MIG.
- Enabling MIG allows partitioning a single GPU into multiple smaller instances.
MIG Profile:- Specify how you wish to partition the GPU (for example, selecting
1g.5gb(x7)splits one A100 GPU into 7 instances).
- Specify how you wish to partition the GPU (for example, selecting

5
Connecting to VESSL

- Visit vessl.ai and sign up or log in.
- Navigate to the Clusters section and click New Cluster.
- When selecting OCI OKE as the cluster type, an OCI Token will appear.
- Copy the OCI Token and paste it into the VESSL Agent Access Token field on the OCI Marketplace form.

6
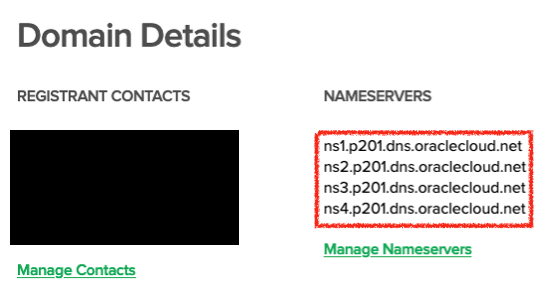
DNS configuration
Once you fill out the form and click Next at the bottom, the DNS key and
value will be displayed in the output section. Please copy this DNS
information and update your domain’s nameserver settings accordingly.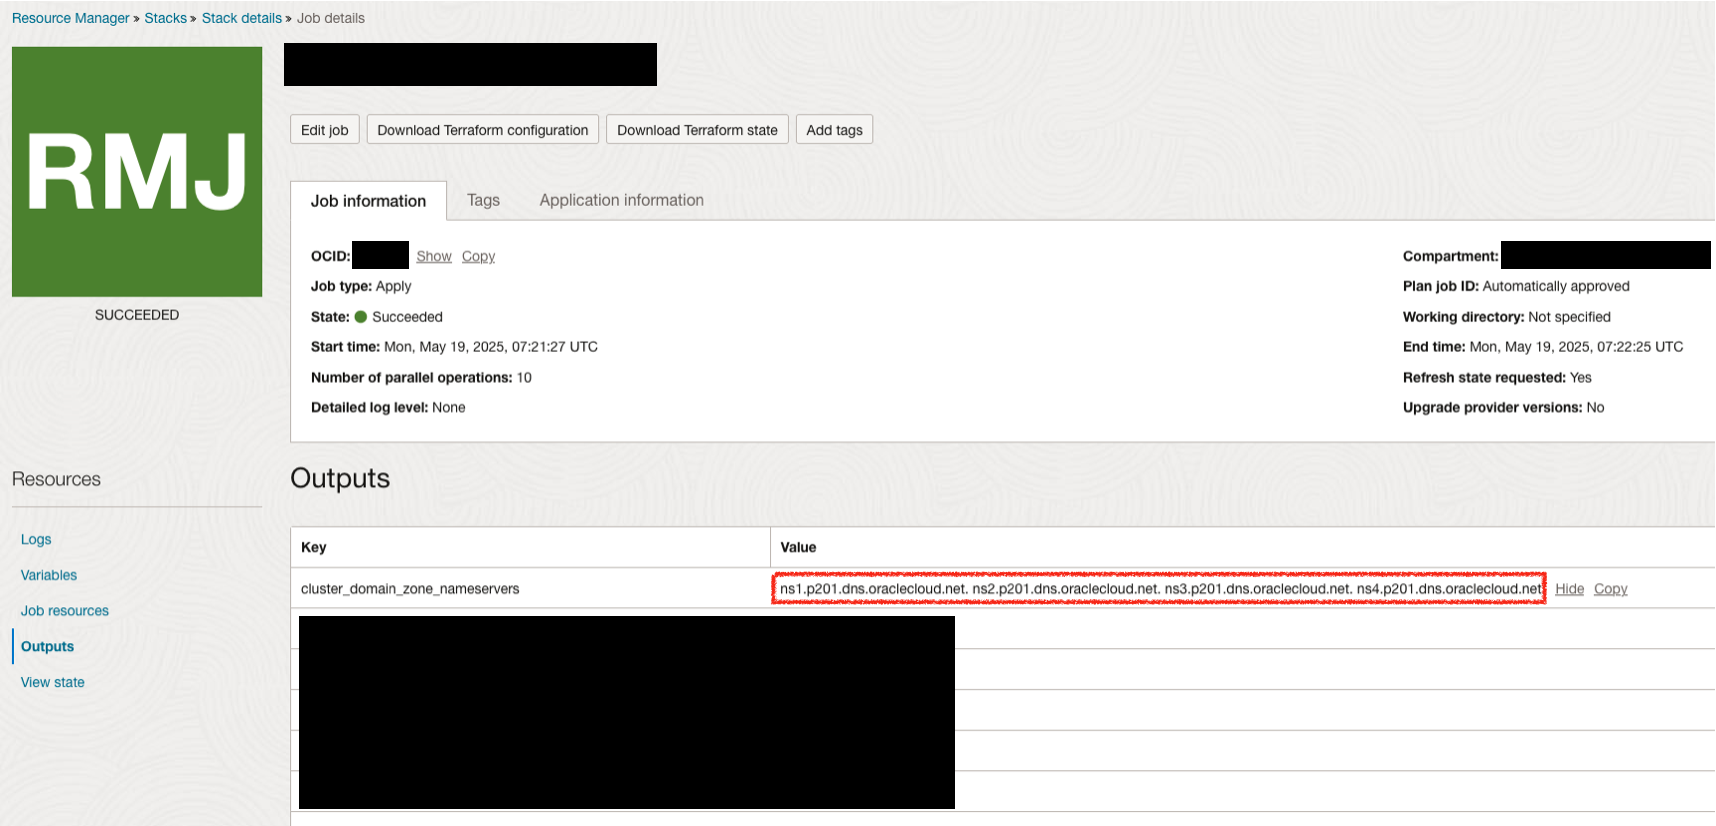
7
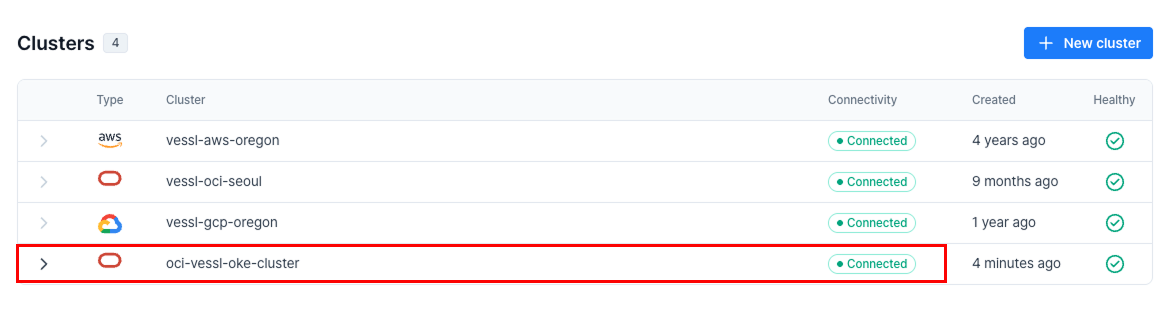
Complete integration
Once all configurations are submitted and the stack is successfully created,
your OCI Cluster will appear in VESSL as an integrated resource, ready
for deployment and inference workloads.