Import/Export object storage
You can import AWS S3 or GCP GCS to your VESSL Run workload. You can export your run results to them.
How it works
Common
- To use private resources, you need to integrate your cloud provider. See Add Integrations.
- You can apply the integrated secret when defining the import/export operation.
Import
- Copies all the data under the bucket and path prefix that you configured into your workload’s specified path.
- Fired when initializing the workload. If data size is large, it takes longer time than when the size of your data is smaller.
Export
- Copies all the data from your workload’s specified path to your bucket’s specified path.
- Fired when the workload successfully done its job. As import operation, it takes longer time depends on your data size.
Guide: Import/Export object storage
- Create
New runby navigating toYour Project > Runand clickNew run. - At the
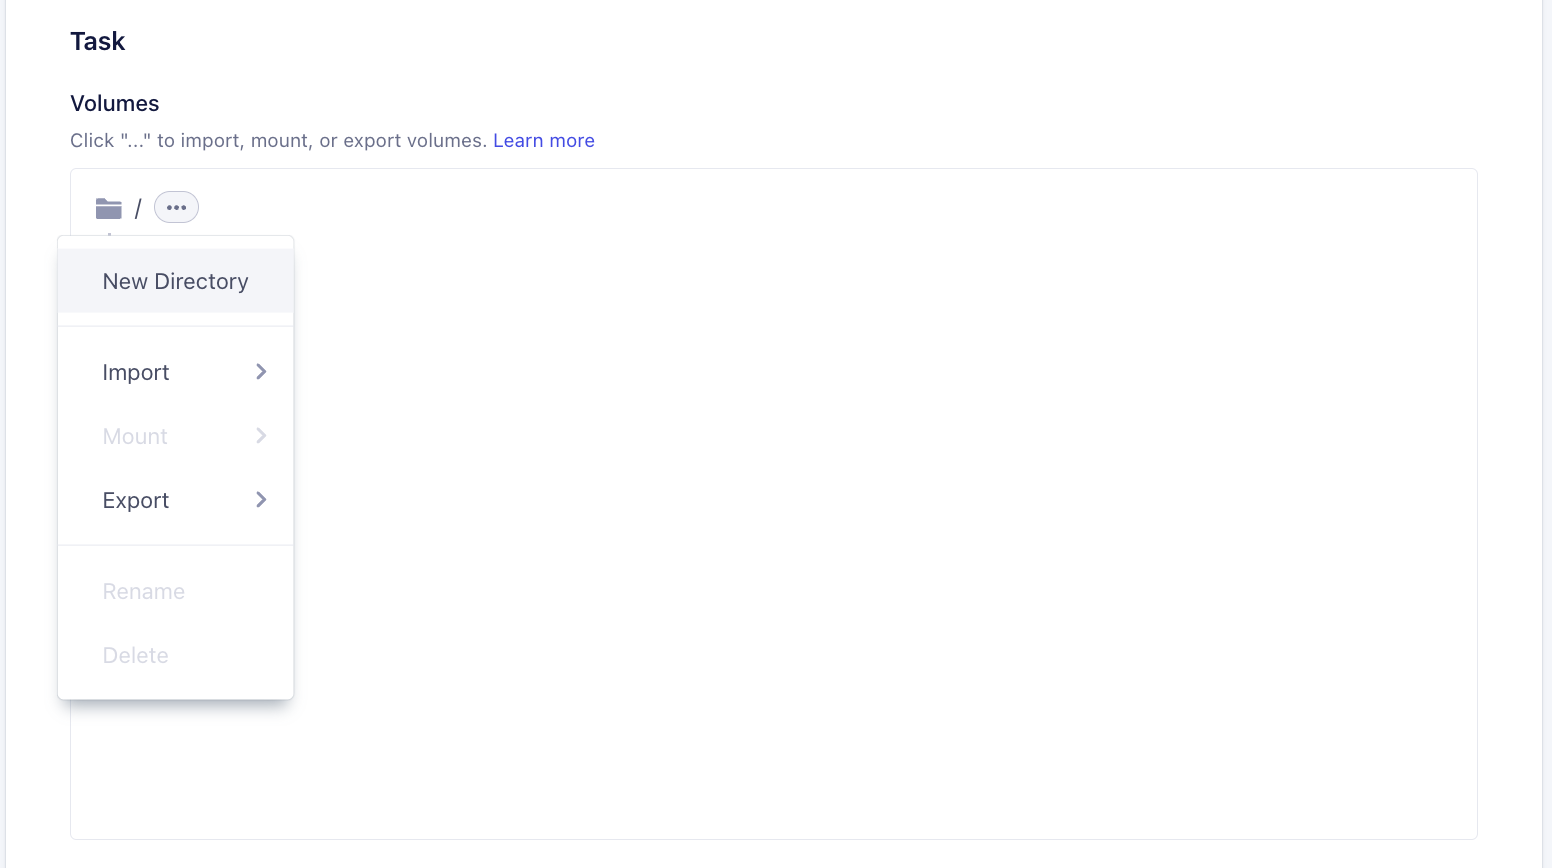
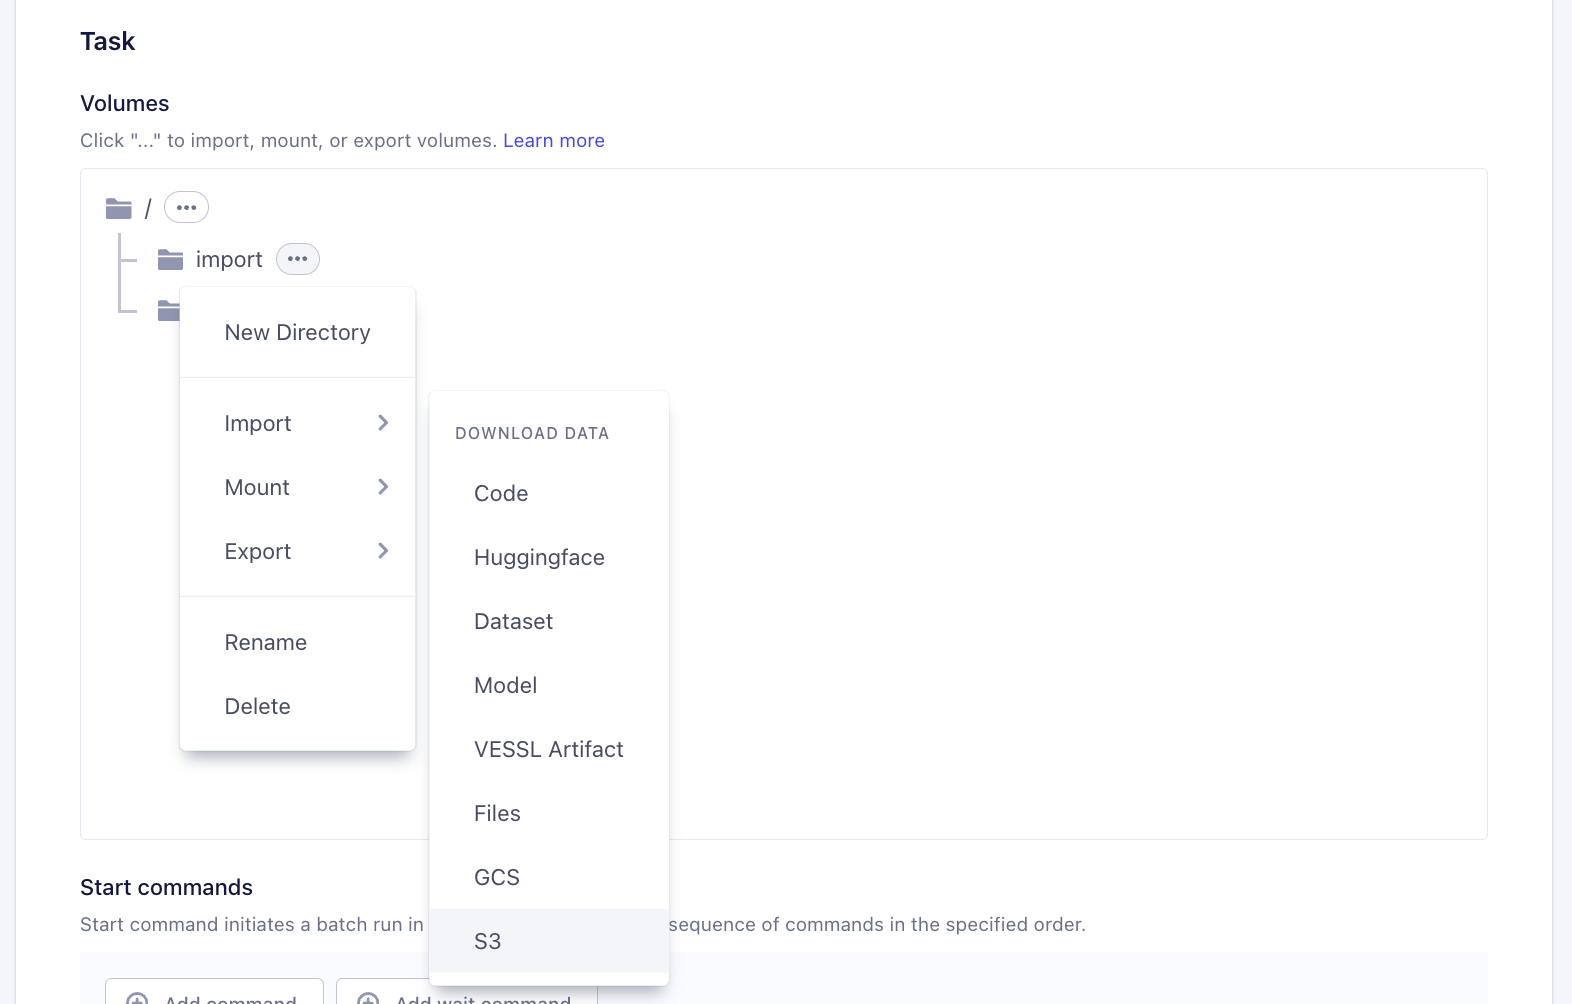
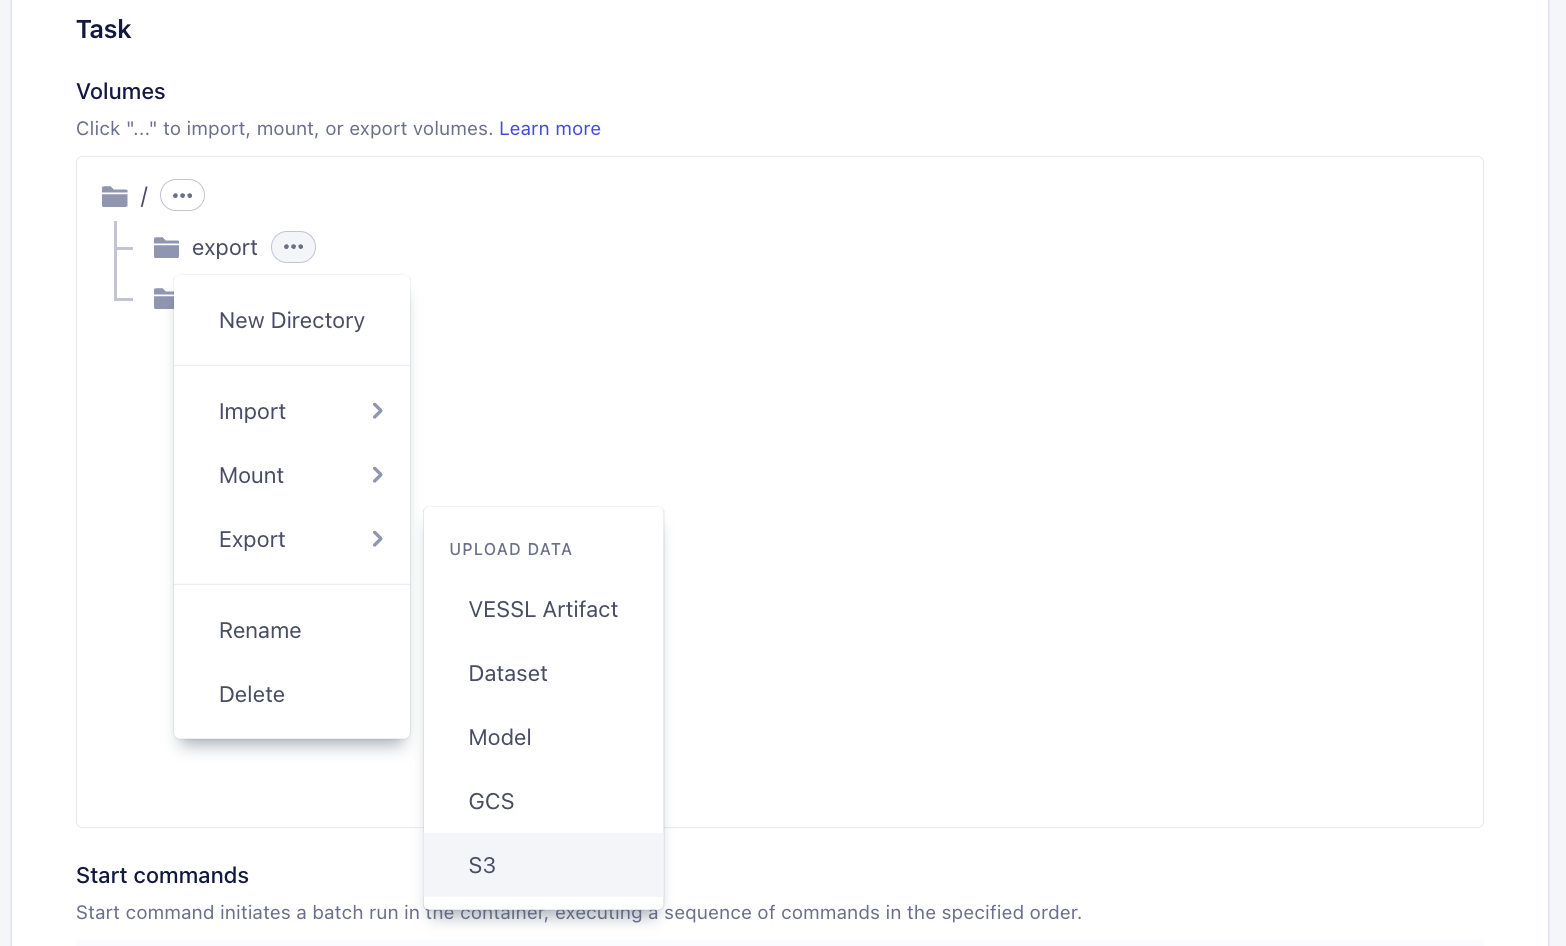
Task > Volumessection, click context menu andImport/Export > S3 / GCP. You can create a new directory for the import / export to work.
- (Optional) To create a new directory
- Import
- Export
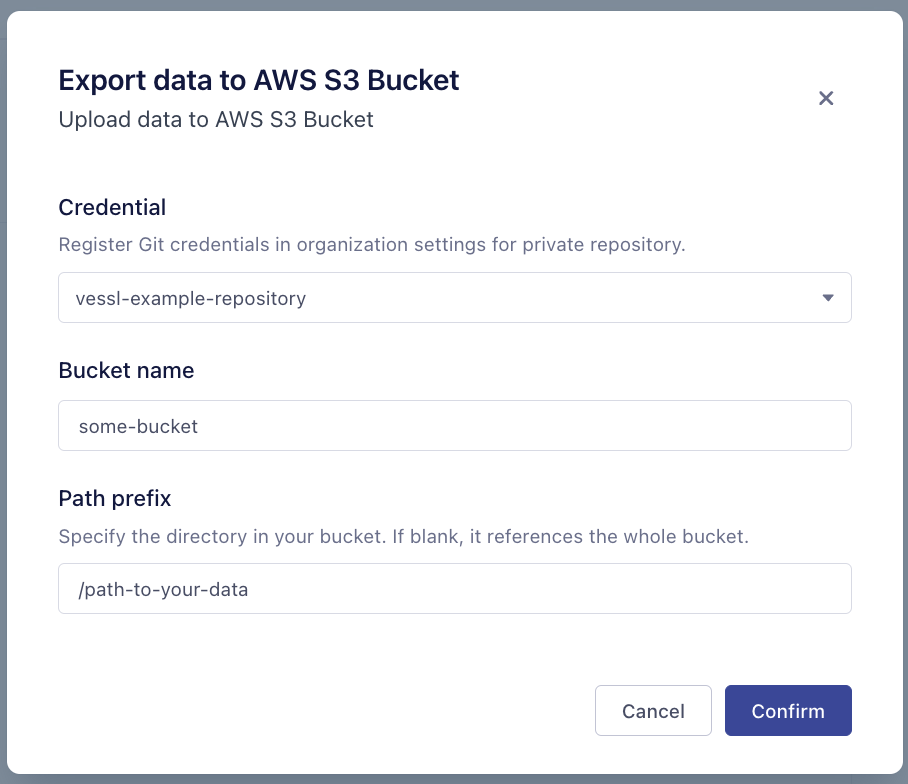
- Apply credential if you want to import/export a private object storage.
- Example: Adding S3 integration for export
- Start a run and you can access the imported objects after initializing.
- Check your export target object storage after a successful run for your output data.
Mount Google Cloud Storage with FUSE on VESSL Run
This feature is currently on beta. It is only supported when you want to attach GCS on VESSL Managed GCP Clusters.You can just mount the GCS with FUSE on your VESSL Run. You will be able to read/write as if filesystem. The data is used only by your workload and the access is only alive for your VESSL Run’s lifecycle.
How to mount GCS on a new VESSL RUN
-
Navigate to
New run - Fill out necessary fields. In this example, you can start from the following yaml.
Simple gcs-fuse mount example
- Select Resouces > Cluster to
(OCI) vessl-oci-sanjose.
Using this feature on other clusters - managed AWS cluster, on-prem clusters - will be available soon.

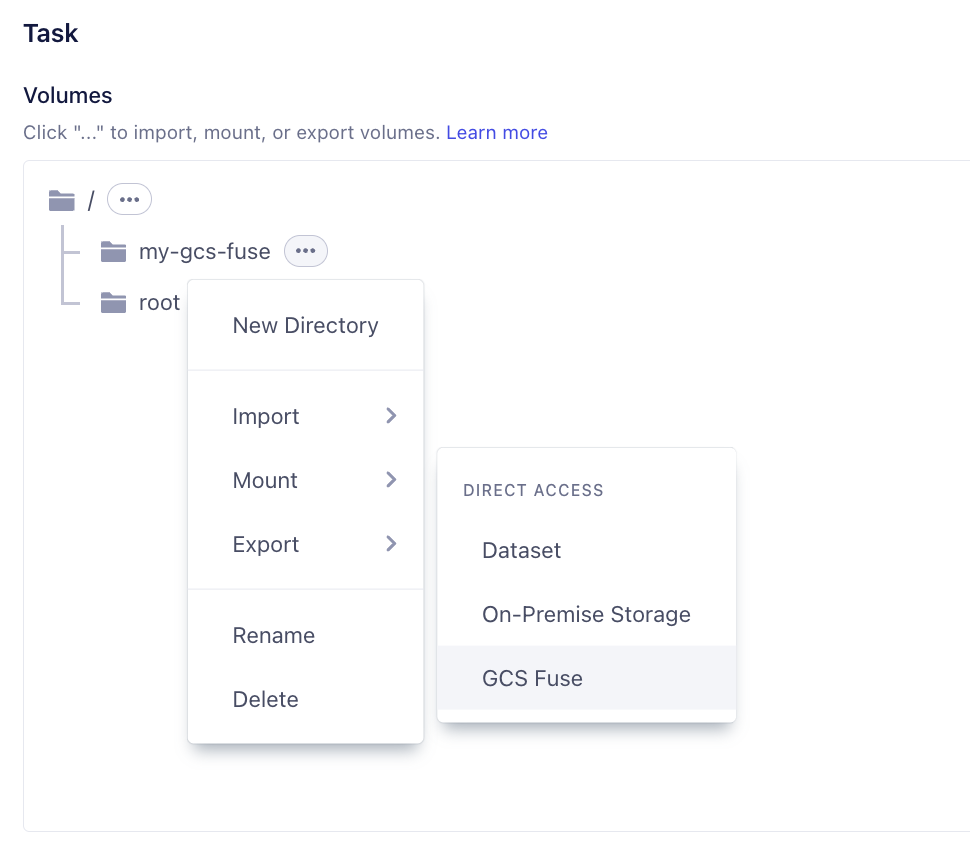
- Create a new directory and Mount > GCS FUSE. The option should be enabled only if cluster is selected as (gcp) vessl-gcp-oregon .
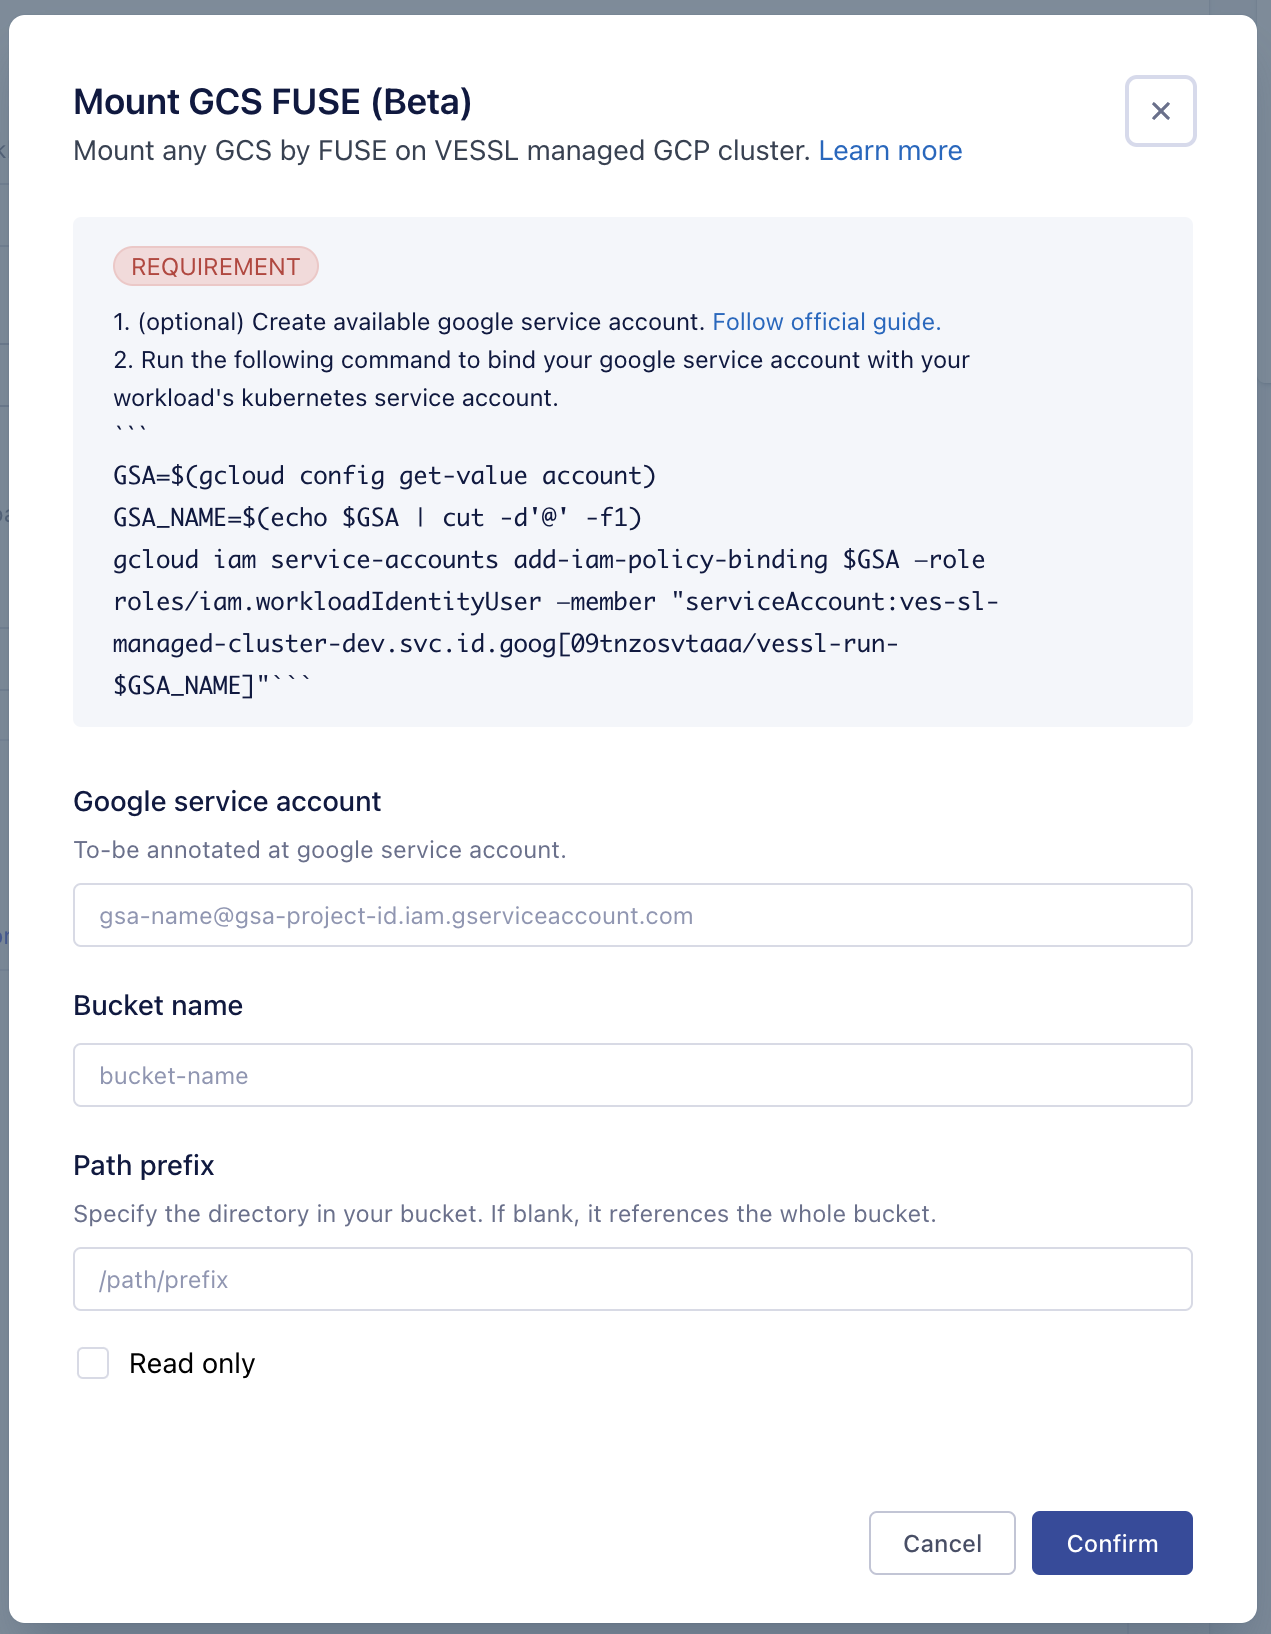
- Follow the guide on the popup to create and bind your google service account with our VESSL managed GCP cluster.
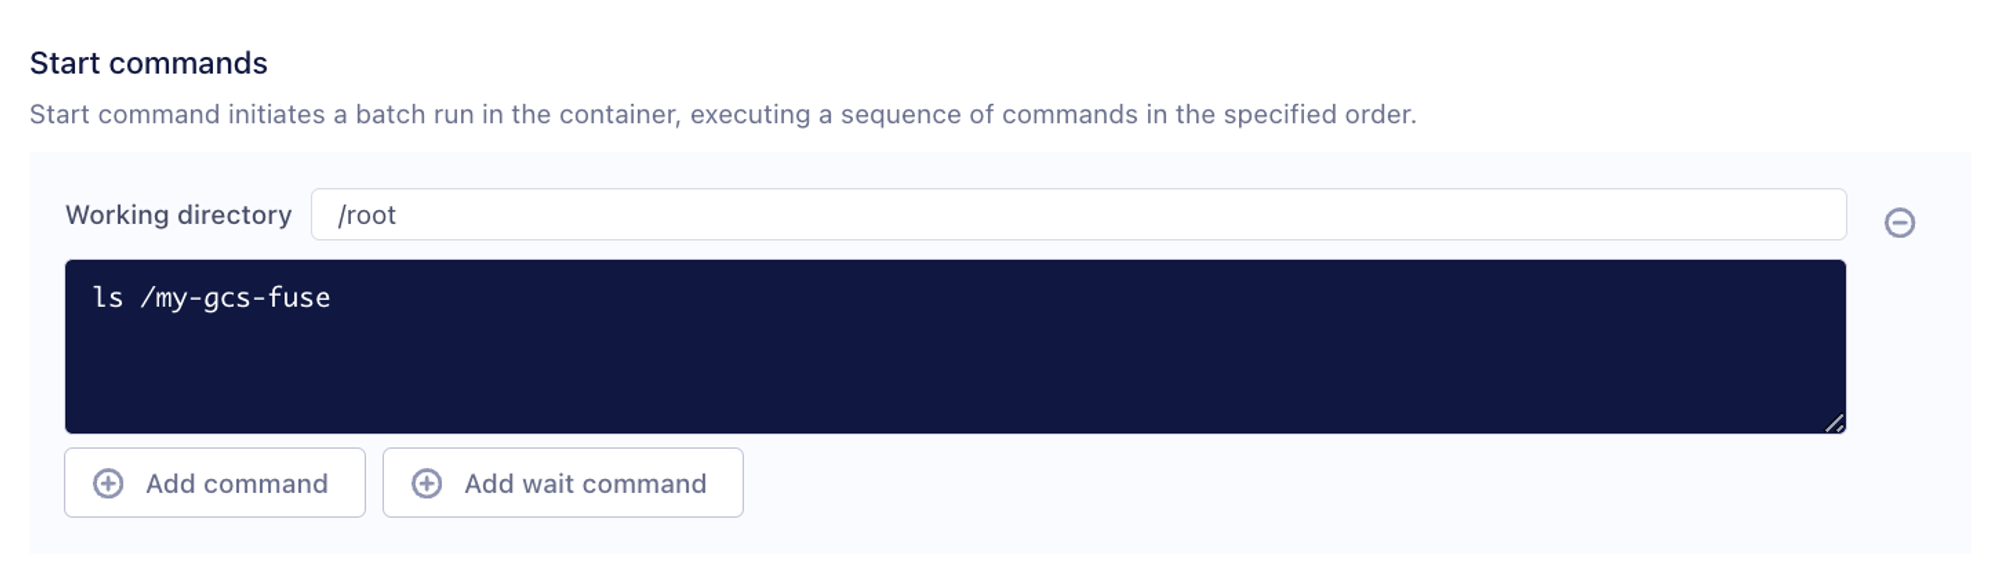
- Add command to access your data in gcs.
ls /my-gcs-fuse to check the data inside.
Disclaimer: GCS I/O operations billing.
The billing for the GCS I/O operations are not covered by VESSL. It follows the corresponding pricing plan by Google Cloud Platform. Learn more on https://cloud.google.com/storage/#pricingLimitations
- This feature is currently on beta. It is only supported when you want to attach GCS on VESSL Managed GCP Clusters.
- After a run is finished, the policy binding on your google service account to temporary k8s service account for VESSL managed GCP will become dangling reference. You might want to create a new google service account for the usage of VESSL Project and cleanup for each project.
More to know
- GCS FUSE CSI driver : https://cloud.google.com/kubernetes-engine/docs/how-to/persistent-volumes/cloud-storage-fuse-csi-driver
Guide: Create your google service account and bind roles
You can follow the steps to create your google service account and bind to our VESSL managed GCP cluster.- Sign up and create a project on GCP, https://cloud.google.com/cloud-console/
- Install gcloud CLI, https://cloud.google.com/sdk/docs/install
- Login CLI
- Get your project id and set your google service account name. This will make full service account name of
$GSA_NAME@$GSA_PROJECT_ID.iam.gserviceaccount.com
- Set Project ID.
- Set service account name to create (ex.
my-service-account).
- Create a service account
- Add necessary roles to the service account
- Create a key file. You should provide
KEY_FILE_NAME. This will generate and downloadKEY_FILE_NAMEto your current folder.
- Add the generated service account json key on GCP integrations settings. It is located at organization > settings > integrations.
-
Select the newly added GCP credential in the
Mount GCS Fusemodal. Then, continue following the provided instructions to complete the setup process.