> ## Documentation Index
> Fetch the complete documentation index at: https://docs.vessl.ai/llms.txt
> Use this file to discover all available pages before exploring further.
# GPU-accelerated notebook
> Launch a Jupyter Notebook server with an SSH connection
This example deploys a Jupyter Notebook server. You will also learn how you can connect to the server on VS Code or an IDE of your choice.
Note that if you want to save your credits, remember to **Terminate** to stop
and end the runs.
## What you will do
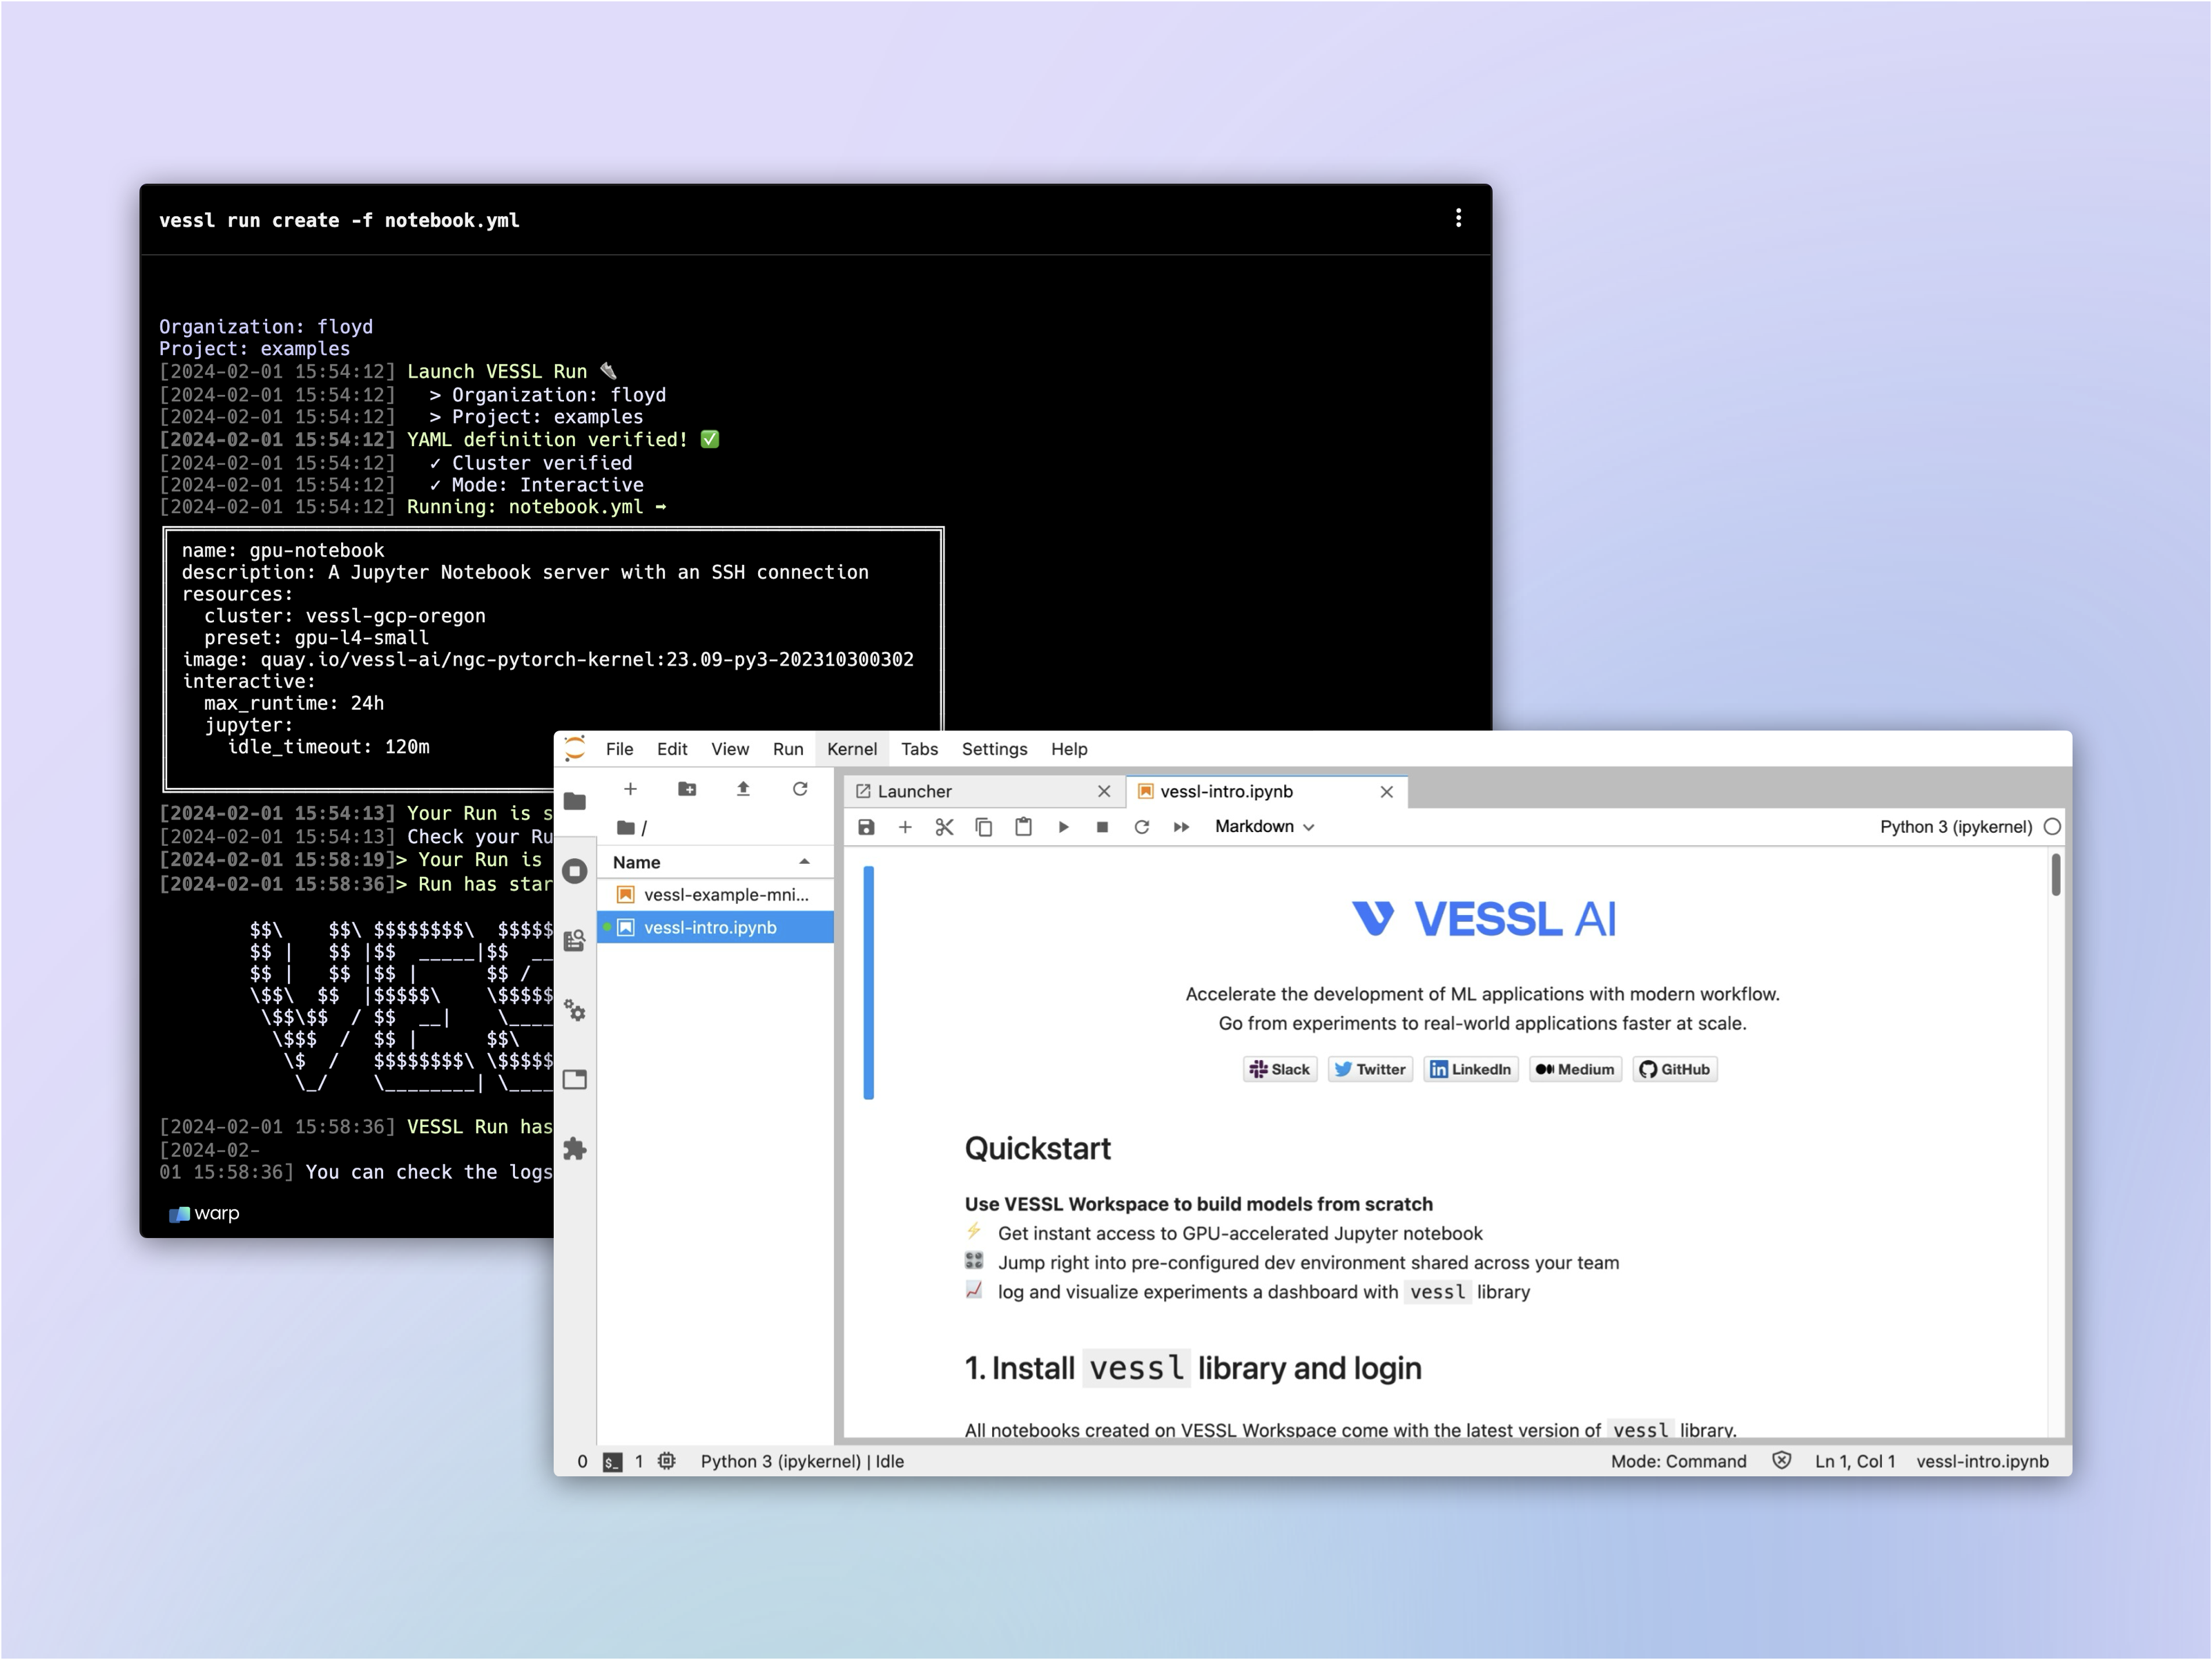 * Launch a GPU-accelerated interactive workload
* Set up a Jupyter Notebook
* Use SSH to connect to the workload
## Writing the YAML file
Let's start by creating `notebook.yaml` file and fill it in.
Let's repeat the steps from [Quickstart](/guides/get-started/quickstart) and define the compute resource and runtime environment for our workload. Again, we will use the L4 instance from our managed cloud and the latest PyTorch container from NVIDIA NGC.
```yaml theme={null}
name: Jupyter notebook
description: A Jupyter Notebook server with an SSH connection
resources:
cluster: vessl-oci-sanjose
preset: gpu-a10-small
image: quay.io/vessl-ai/torch:2.3.1-cuda12.1-r5
```
By default, workloads launched with VESSL Run are batch jobs like the one we launched in our Quickstart example. On the other hand, interactive runs are essentially virtual machines running on GPUs for live interaction with your models and datasets.
You can enable this with the `interactive` key, followed by the `jupyter` key. Interactive runs come with a default field for idle culler which automatically shuts down user notebook servers when they have not been used for a certain period.
`max_runtime` works with `idle_timeout` as an additional measure to prevent resource overuse
```yaml theme={null}
name: Jupyter notebook
description: A Jupyter Notebook server with an SSH connection
resources:
cluster: vessl-oci-sanjose
preset: gpu-a10-small
image: quay.io/vessl-ai/torch:2.3.1-cuda12.1-r5
interactive:
jupyter:
idle_timeout: 120m
max_runtime: 24h
```
## Running the workload
Now that we have a completed YAML, we can once again run the workload with `vessl run`.
```
vessl run create -f notebook.yaml
```
* Launch a GPU-accelerated interactive workload
* Set up a Jupyter Notebook
* Use SSH to connect to the workload
## Writing the YAML file
Let's start by creating `notebook.yaml` file and fill it in.
Let's repeat the steps from [Quickstart](/guides/get-started/quickstart) and define the compute resource and runtime environment for our workload. Again, we will use the L4 instance from our managed cloud and the latest PyTorch container from NVIDIA NGC.
```yaml theme={null}
name: Jupyter notebook
description: A Jupyter Notebook server with an SSH connection
resources:
cluster: vessl-oci-sanjose
preset: gpu-a10-small
image: quay.io/vessl-ai/torch:2.3.1-cuda12.1-r5
```
By default, workloads launched with VESSL Run are batch jobs like the one we launched in our Quickstart example. On the other hand, interactive runs are essentially virtual machines running on GPUs for live interaction with your models and datasets.
You can enable this with the `interactive` key, followed by the `jupyter` key. Interactive runs come with a default field for idle culler which automatically shuts down user notebook servers when they have not been used for a certain period.
`max_runtime` works with `idle_timeout` as an additional measure to prevent resource overuse
```yaml theme={null}
name: Jupyter notebook
description: A Jupyter Notebook server with an SSH connection
resources:
cluster: vessl-oci-sanjose
preset: gpu-a10-small
image: quay.io/vessl-ai/torch:2.3.1-cuda12.1-r5
interactive:
jupyter:
idle_timeout: 120m
max_runtime: 24h
```
## Running the workload
Now that we have a completed YAML, we can once again run the workload with `vessl run`.
```
vessl run create -f notebook.yaml
```
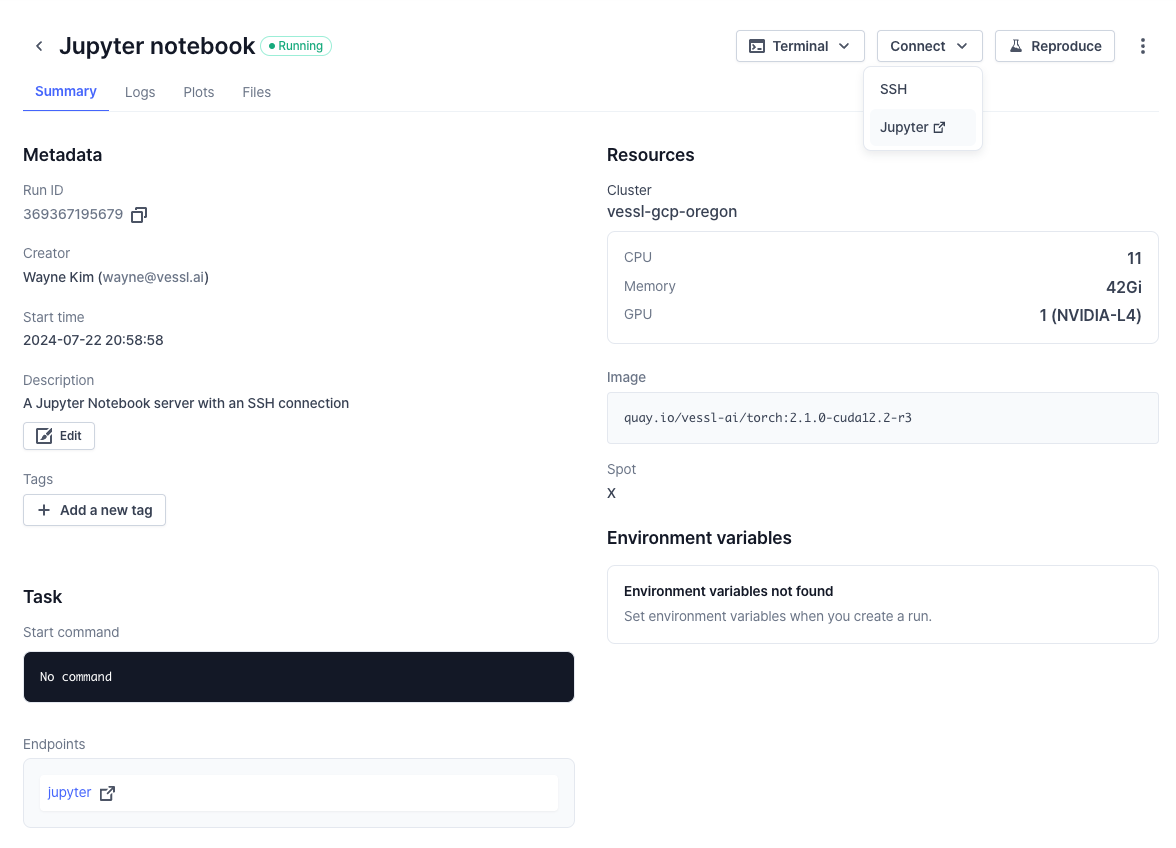
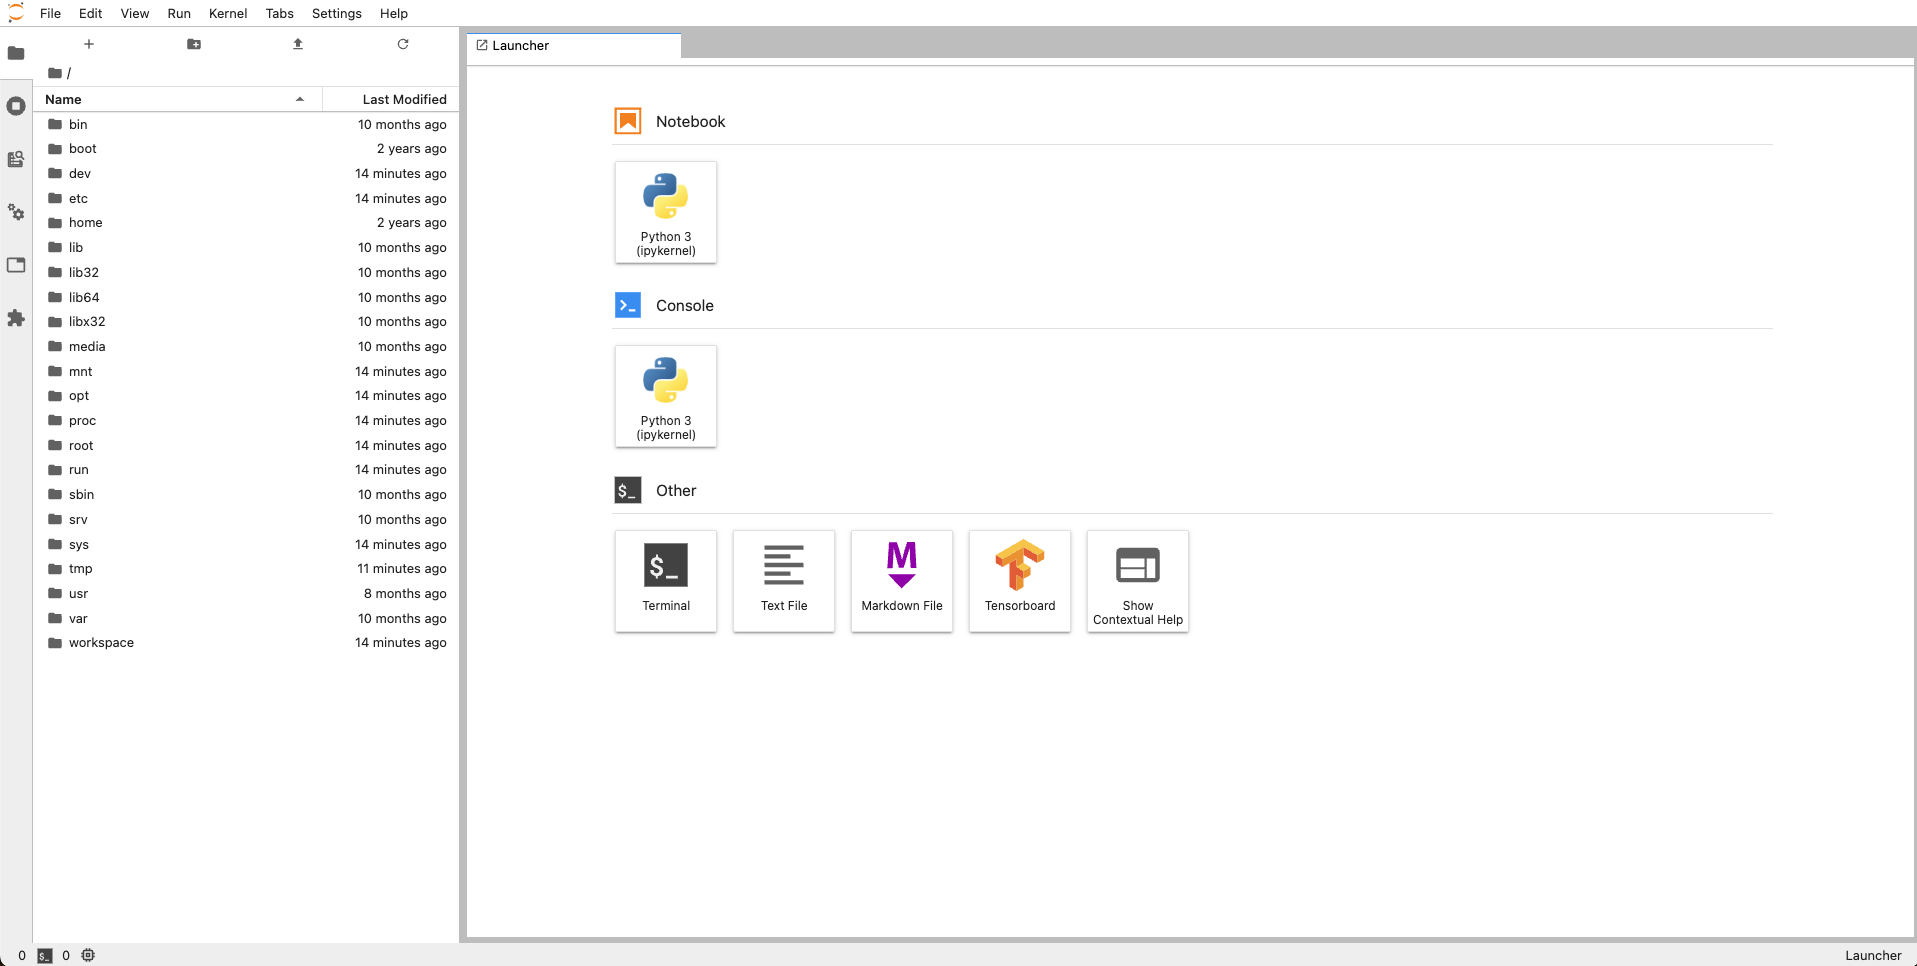
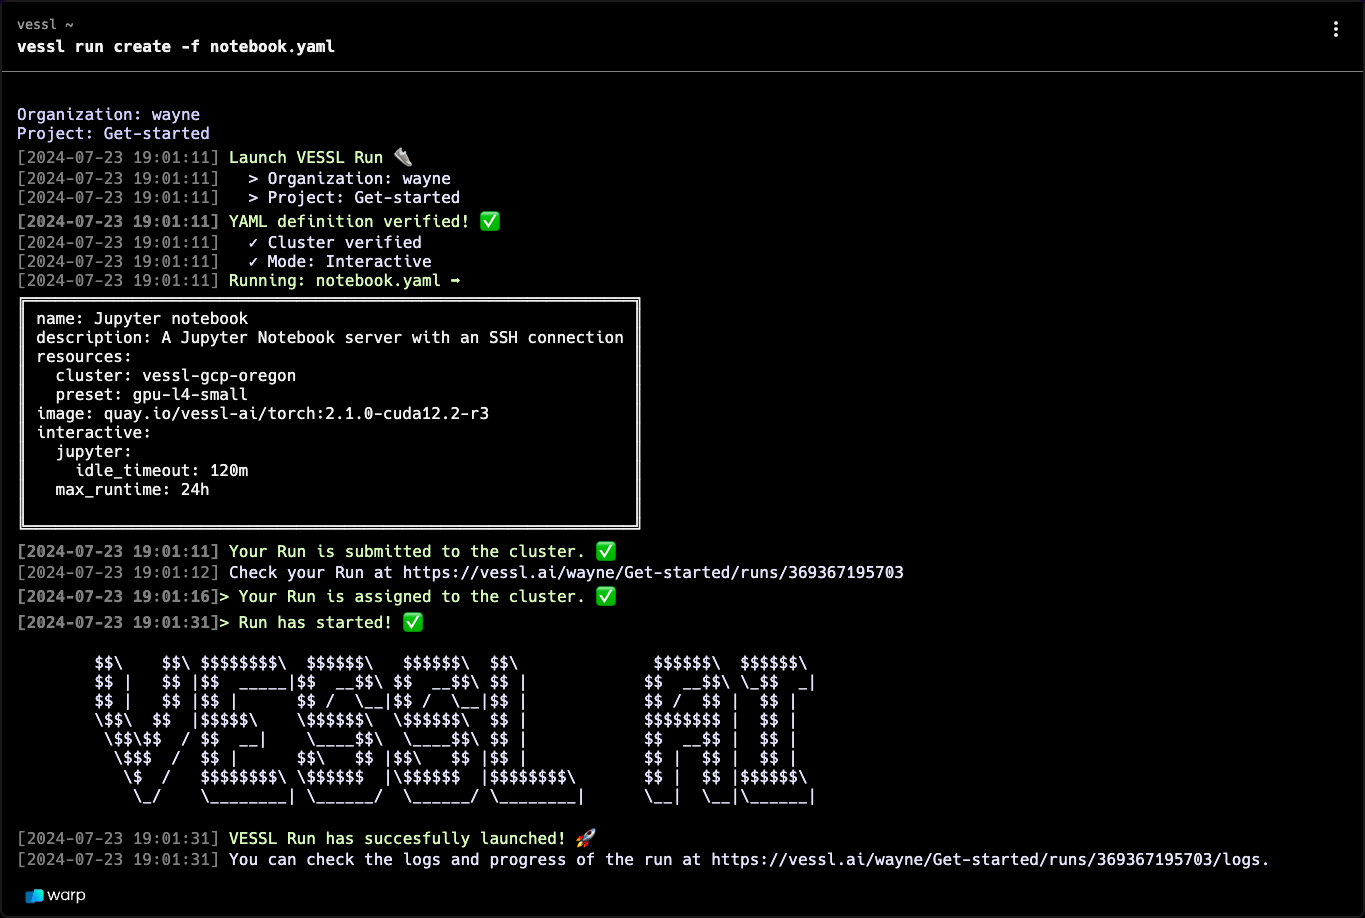 Running the command will verify your YAML and show you the current status of the workload. Click the output link in your terminal to see the full details and realtime logs of the **Run** on the web. Click **Jupyter** under **Connect** to launch a notebook.
 ## Create an SSH connection
An interactive run is essentially a GPU-accelerated workload on a cloud with a port and an endpoint for live interactions. This means you can access the remote workload using SSH.
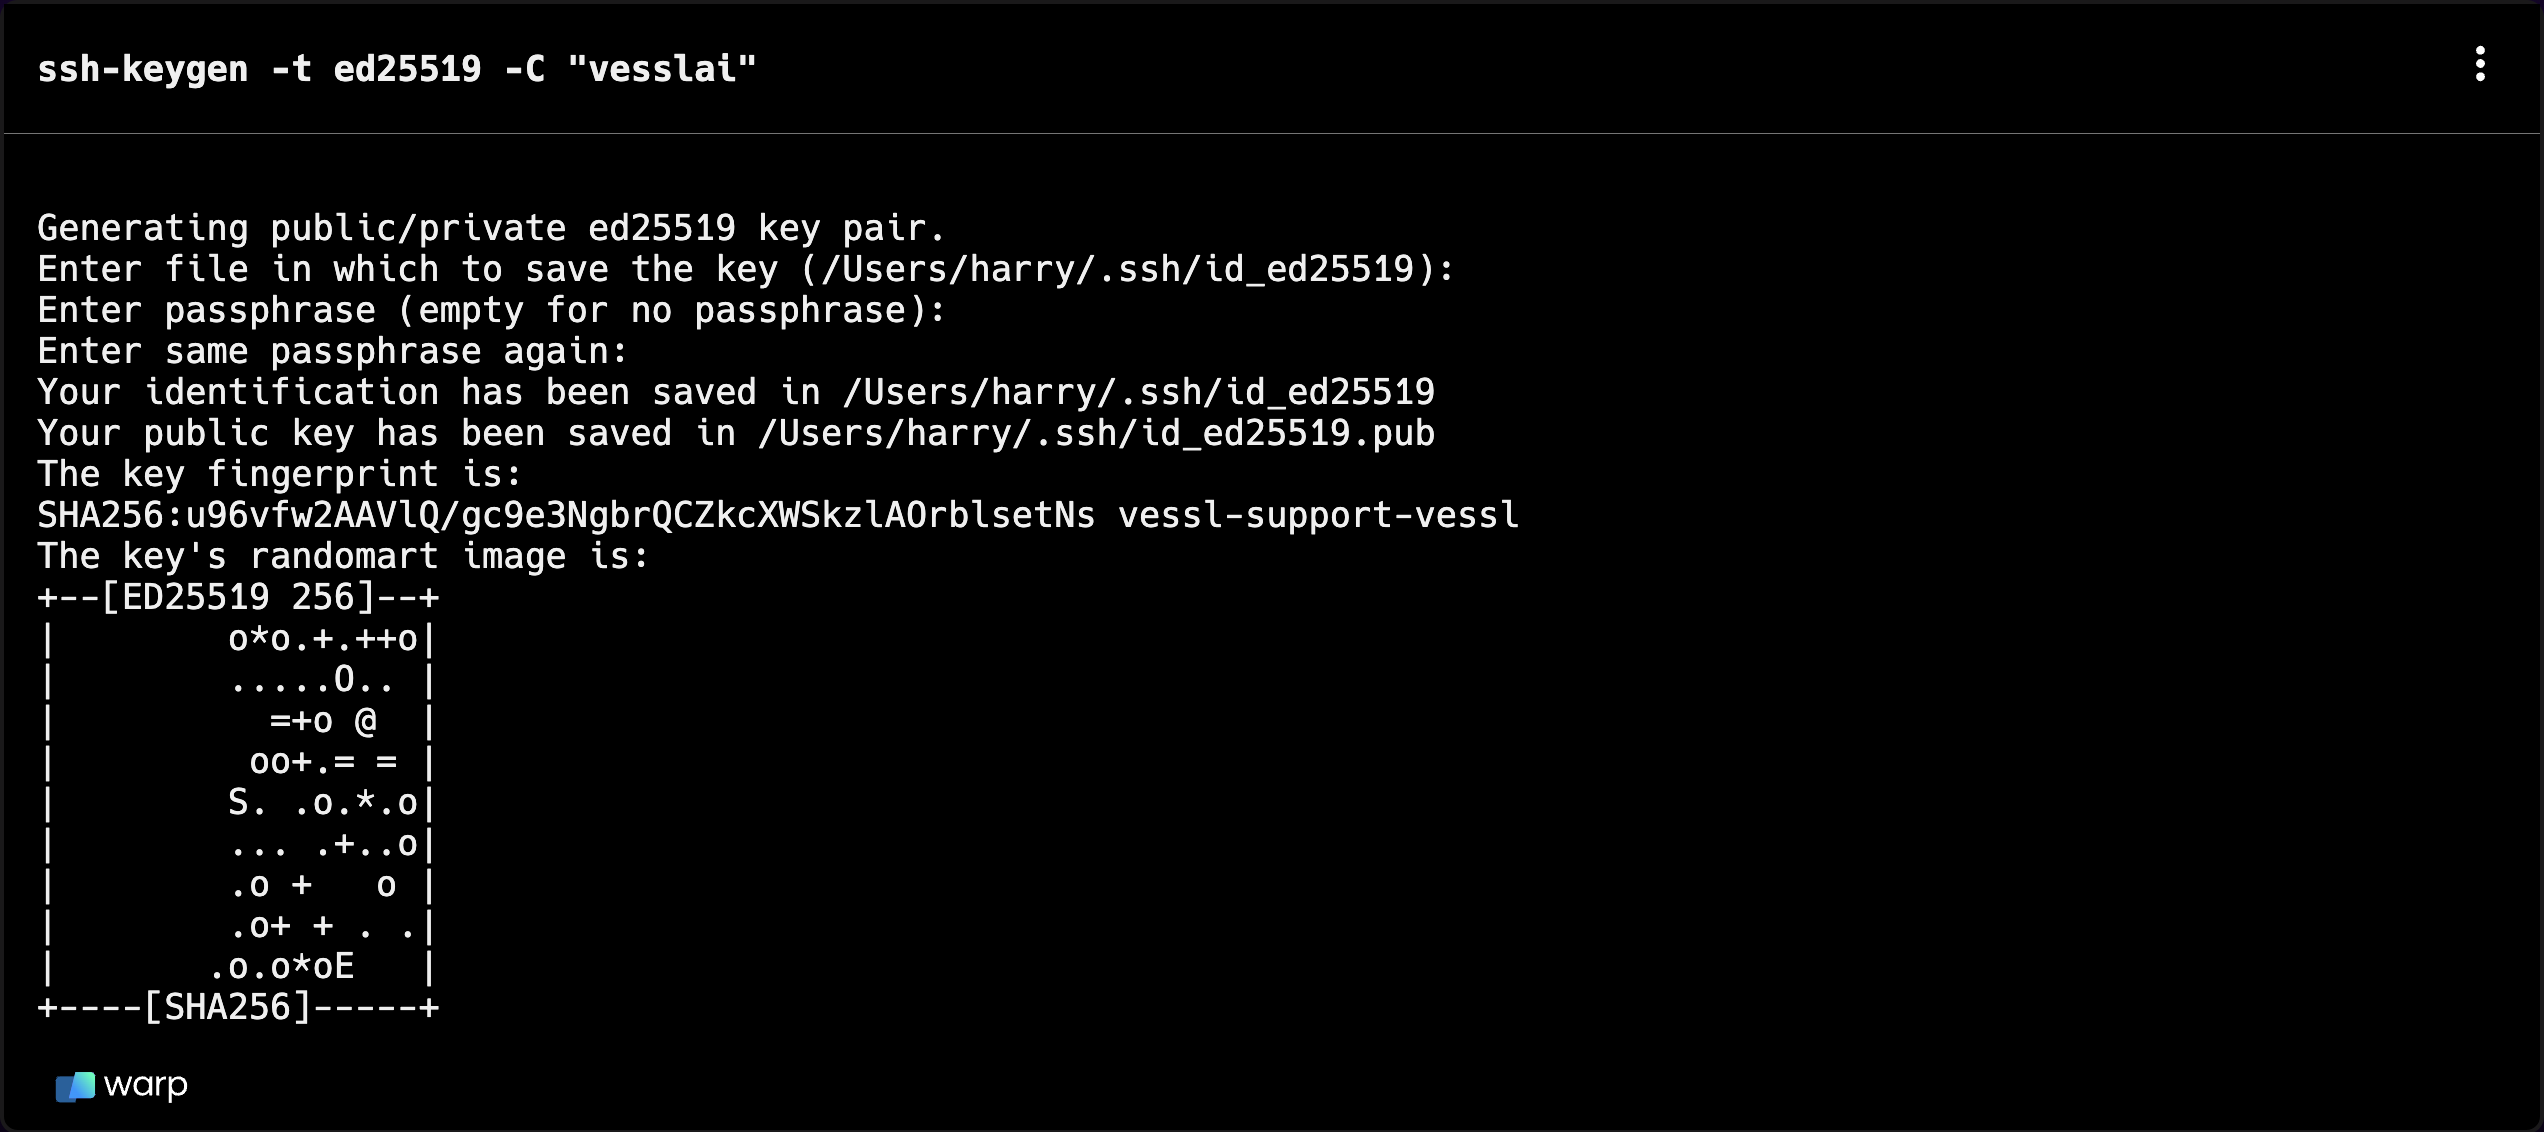
First, get an SSH key pair.
`ssh-keygen -t ed25519 -C "vesslai"`
## Create an SSH connection
An interactive run is essentially a GPU-accelerated workload on a cloud with a port and an endpoint for live interactions. This means you can access the remote workload using SSH.
First, get an SSH key pair.
`ssh-keygen -t ed25519 -C "vesslai"`
 `vessl ssh-key add`
Press "enter" three times.
`vessl ssh-key add`
Press "enter" three times.
 Use the workload address from the **Run Summary** page to connect. You are ready
to use [VS Code](https://code.visualstudio.com/docs/remote/ssh) or an IDE
of your choice for remote development.
Use the workload address from the **Run Summary** page to connect. You are ready
to use [VS Code](https://code.visualstudio.com/docs/remote/ssh) or an IDE
of your choice for remote development.
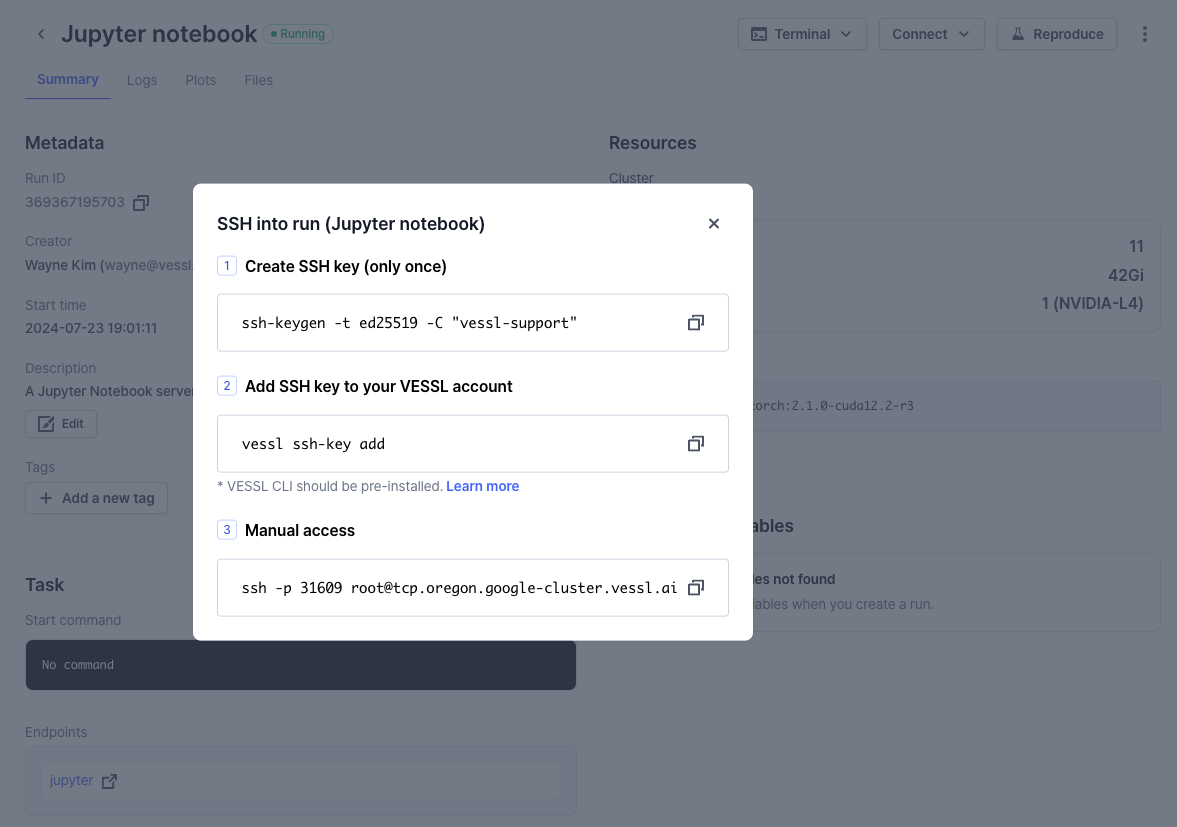 **Manual access:** The below command for manual access may change when you
perform a new run due to changes in IP address, user account, port number,
SSH key file path, proxy settings, or other options.
**Manual access:** The below command for manual access may change when you
perform a new run due to changes in IP address, user account, port number,
SSH key file path, proxy settings, or other options.
`ssh -p 22
root@34.127.82.9`
## Tips & tricks
Keep in mind that GPUs are fully dedicated to a notebook server --and therefore consume credits-- even when you are not running compute-intensive cells. To optimize GPU usage, use tools like [nbconvert](https://nbconvert.readthedocs.io/en/latest/usage.html#executable-script) to convert the notebook into a Python file or package it as a Python container and run it as a batch job.
You can also mount volumes to interactive workloads by defining `import` and reference files or datasets from your notebook.
## Using our web interface
You can repeat the same process on the web. Head over to your **Organization**, select a project, and create a **New run**.
## What's next?
Next, let's see how you use our interactive workloads to host a web app on the cloud using tools like Streamlit and Gradio.
Launch an interactive web application for image generation
Fine-tune Phi-4 with counselling datasets
Serve & deploy vLLM-accelerated Phi-4-mini-reasoning